Make a magical first impression with garland-draped stairs, lantern lighting, a hot cocoa landing zone, and easy, elegant foyer styling tricks for your Chris...
The Festive Dwell
How to Drape Christmas Garland on a Staircase
Learn how to swag Christmas garland along a staircase banister with even drops, fluffy greenery, and a handrail you can still grab. Measuring, anchoring, lights, ribbon, and damage-free tips.

Clara Jenkins
Clara Jenkins is a former visual merchandiser and lifelong holiday enthusiast who believes every season is worth celebrating. She helps readers transform their everyday spaces into magical, welcoming homes through budget-friendly DIYs, elegant tablescapes, and clever styling tricks. When she isn't untangling fairy lights or hot-gluing autumn wreaths, Clara can be found hunting for vintage ornaments at local flea markets.
Published November 16, 2026
The year I worked visual merchandising for a big home decor retailer, staircases were the thing customers photographed most. Not the tree. Not the mantel. The stairs. In our store, it honestly felt like a garlanded banister got more camera time than anything else. Something about it feels like a warm welcome the second you walk in, especially when the swags are even and the handrail is still actually usable.
Below is my tried and true method for draping Christmas garland on a staircase: how to measure, where to anchor, how deep to swag, and how to attach it without messing up your wood finish.
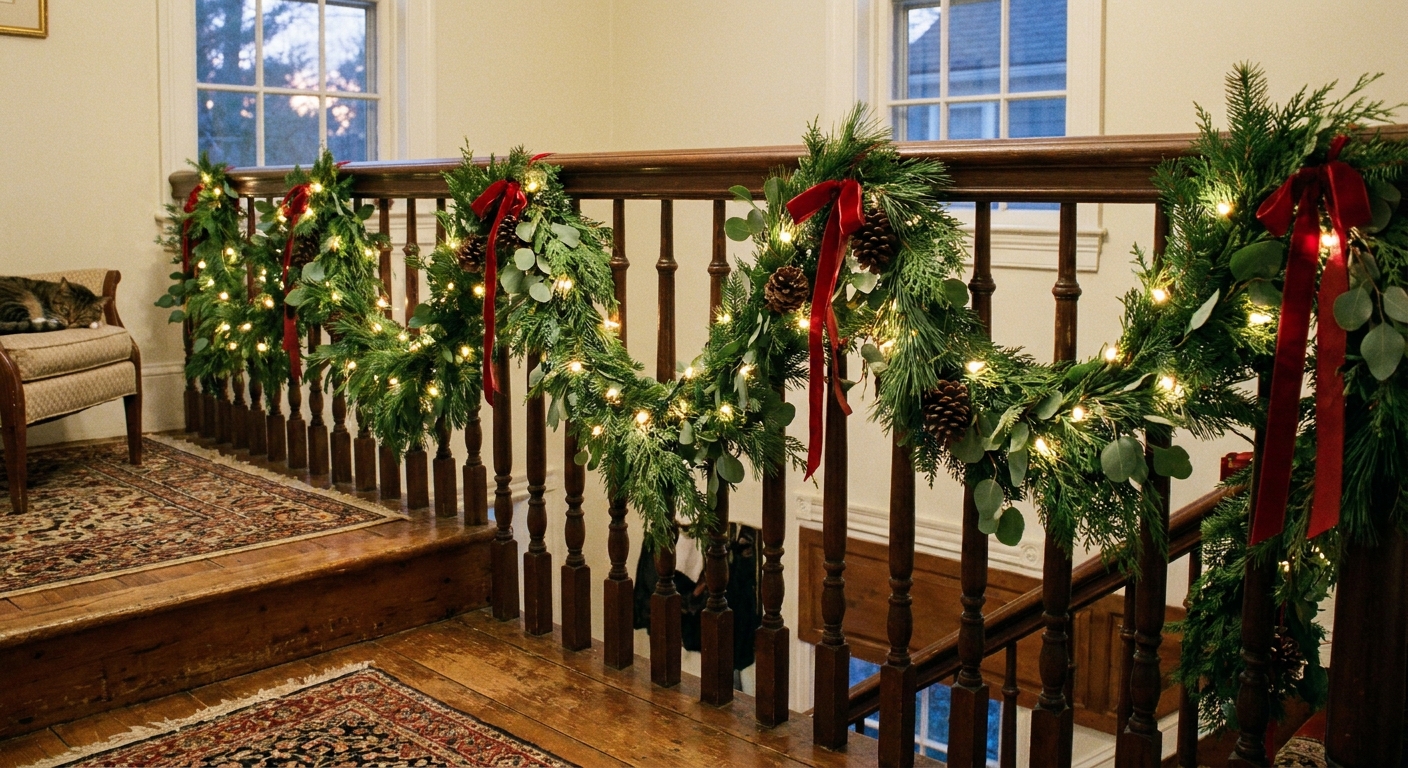
What you need (and what I skip)
- Garland: faux or real, long enough for your stair run (we will measure in the next section)
- Anchors: clear zip ties, floral wire, or thin jute twine (best choice depends on your railing style)
- Damage-free attachment: heavy duty removable hooks or removable outdoor mounting strips (for newel posts or wall-side spots)
- Soft buffer for wood: felt pads, microfiber scraps, or painter’s tape (goes between any tie and finished wood)
- Lights: battery micro lights or a plug-in string with a nearby outlet (UL or ETL-listed is a must for peace of mind)
- Ribbon (optional): wired ribbon is easiest to shape
- Greenery picks (optional but recommended): pine, cedar, eucalyptus (faux or real), plus ornaments if you have sturdy attachment points
- Measuring tape
- Step stool
- Wire cutters or scissors
What I skip: regular clear tape on finished wood, packing tape, and anything with a strong permanent adhesive. The goal is festive, not refinishing the banister in January.
Measure your stair run
Most staircase garland issues start with a bad estimate. Here is the quick, accurate way to measure.
Option A: Measure the rail
- Start at the bottom newel post (or where you want the garland to begin).
- Run your measuring tape along the top edge of the handrail to the top newel post (or ending point).
- Write down that number. This is your rail length.
Option B: Stair math shortcut
If measuring along the rail is awkward, you can get close with total stair measurements. Measure the full flight, not a single step:
- Total run: the horizontal distance from the first riser to the last riser
- Total rise: the vertical distance from the bottom floor to the top floor
Add them together, then add extra length for swags (below). It is not as precise as measuring the rail, but it is a solid backup.
Example: If your total run is 10 feet and your total rise is 8 feet, start with 18 feet. If you want medium swags, you would plan for about 18 x 1.4 = 25 feet of garland.
How much extra to add for swags
These are my starting points. They vary with baluster spacing, railing angle, and how thick your garland is.
- Light swag (shallow dips): about 1.2x your rail length
- Medium swag (classic dips): about 1.4x your rail length
- Deep swag (dramatic drops): about 1.6x your rail length
Clara tip: If you are between lengths, go longer. You can always overlap garland sections, but you cannot stretch a too-short piece without it looking skimpy.
Plan anchors
The secret to even, professional-looking swags is planning your anchor points before you start wrapping anything.
Keep the handrail usable
Most people want the handrail usable. I do too, especially if kids, guests, or grandparents will be using the stairs.
- If possible, position the garland so it sits slightly to the outside of the rail (the side away from where hands naturally slide).
- Aim to leave a few inches of clear gripping space along the top or inside edge of the rail.
Mark anchors like a merchandiser
I like to set anchors at consistent intervals. The exact spacing depends on your railing style, but this works in almost every home:
- One anchor at each end: bottom newel and top newel
- One anchor every 2 to 3 balusters for medium swags
- One anchor every 1 to 2 balusters for deep swags or heavy garland
If you want it extra tidy, use small pieces of painter’s tape to mark the anchor spots temporarily. Tape comes off, stress does not.
Quick notes by railing type
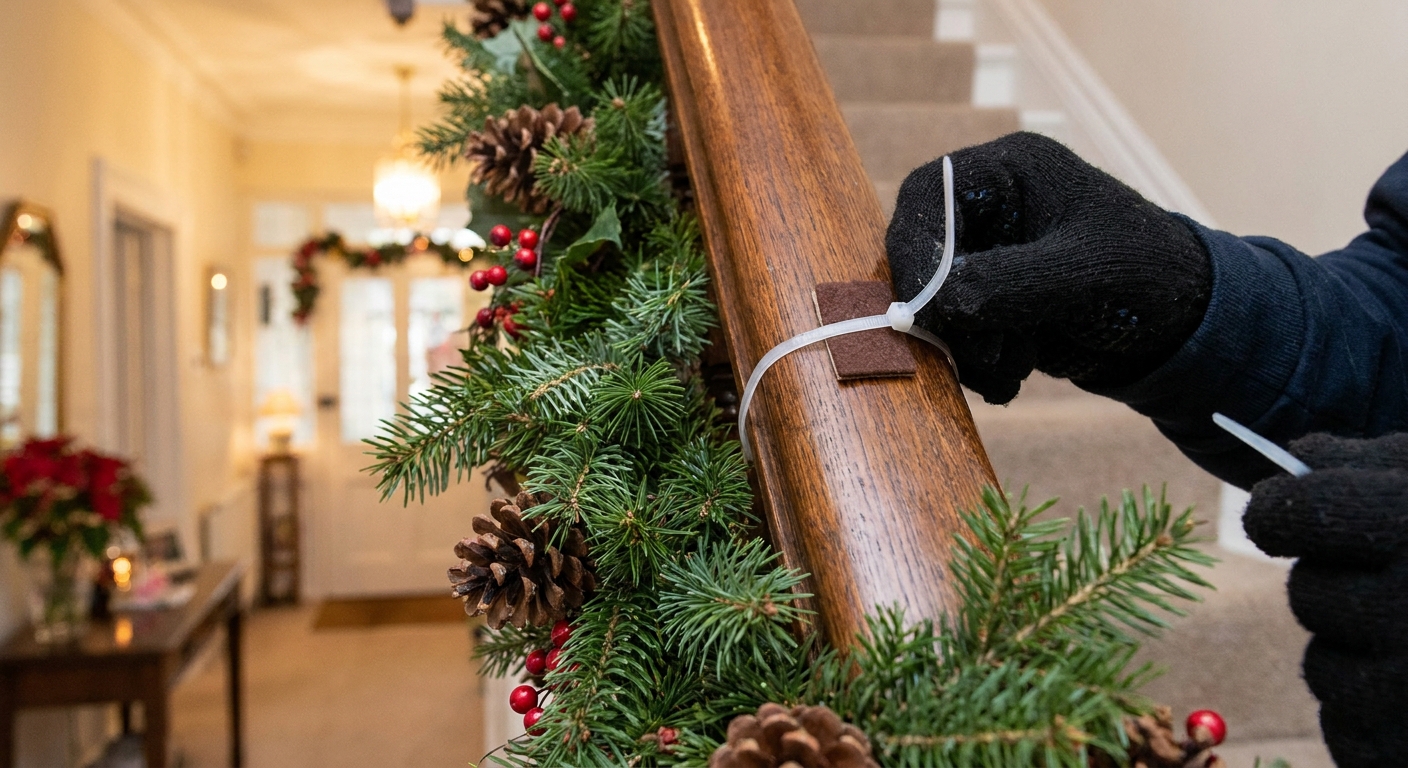
- Wood spindles: zip ties (with a felt buffer) are usually the easiest and most secure.
- Wrought iron: zip ties or floral wire work well, but tuck wire ends so nothing snags sleeves.
- Cable or glass: avoid tying to cables or hardware. Stick to newel posts, the handrail supports, or removable hooks on the wall side.
Choose swag depth
Swag depth is how far the garland drops between anchors. Too shallow looks like you ran out of length. Too deep can interfere with walking and look heavy.
My go-to depths
These are starting ranges. Your baluster spacing and garland thickness will nudge you up or down.
- Shallow: 4 to 6 inches of drop, best for narrow staircases
- Medium: 6 to 10 inches of drop, my everyday favorite
- Deep: 10 to 14 inches of drop, best for wide staircases with plenty of clearance
Safety note: Keep garland and any ribbon tails out of the walking path. If your staircase is tight, go shallower and fluff the greenery for fullness instead of increasing the drop.
Step-by-step draping
1) Fluff first
If your garland is faux, take five minutes to open up the branches. This is the difference between “flat rope” and “luxury greenery.” If it is real, gently shake it outside to drop loose bits.
2) Secure the first end
Start at the bottom newel post or the first stable point. Wrap the garland end around the post once if you can, then secure with a tie.
- Place a small felt pad or a strip of painter’s tape between the tie and the wood if the tie will touch the finish.
- Snip the tail of the zip tie close so it does not scratch hands.
3) Make the first swag
Hold the garland up at your next planned anchor point. Let the garland droop to your chosen depth, then lift and attach at the anchor.
Clara trick for consistent swags: Use your hand span as a measuring tool. For example, if you decide on an 8 inch drop, check the first swag with a tape measure, then repeat that same “look” down the whole staircase.
4) Repeat up the stairs
Work your way upward. Each time you reach an anchor point:
- Fluff the section you just draped.
- Step back one or two steps and check the line.
- Tighten the tie just enough to hold, but not so tight that it crushes the garland.
5) Finish at the top
At the top newel, wrap the garland end behind the post or tuck it into the greenery so it disappears. Secure firmly since this point carries a lot of tension. If the garland is heavy, use two ties or two wrap points at the top newel so it stays put all season.
Wood-safe attachment
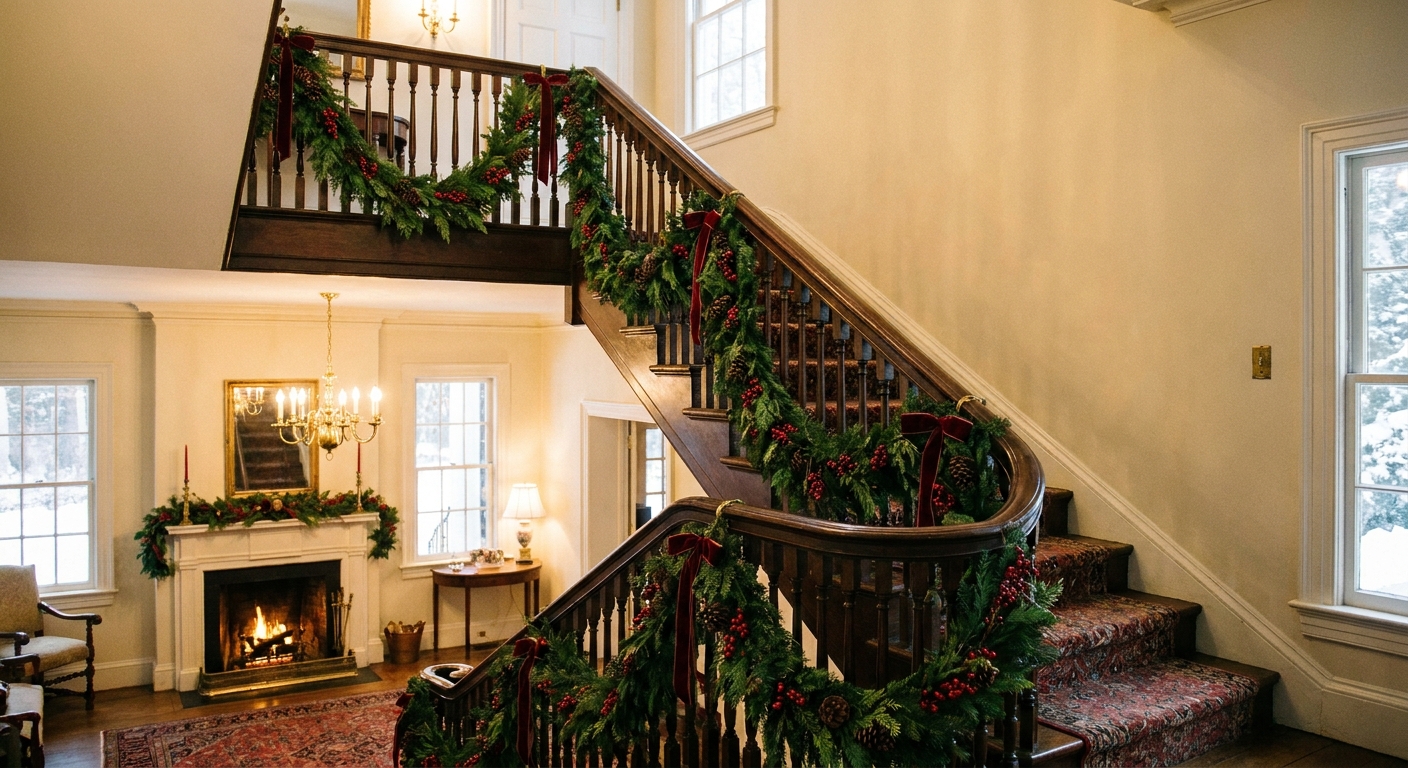
Banisters get touched constantly, so you want a secure hold that does not gouge or peel finish.
Best methods
- Zip ties + felt buffer: very secure, minimal bulk, great on balusters and spindles
- Floral wire + felt buffer: strong and adjustable, but make sure wire ends are tucked so nobody gets poked
- Jute twine: pretty and gentle, best for lighter garlands
- Removable hooks or strips: ideal for smooth newel posts or the wall side of the staircase, but follow package directions for clean removal
What to avoid
- Nails or staples into a finished handrail
- Hot glue on stained or painted wood
- Strong permanent tapes that can lift varnish
Test first: If your staircase finish is delicate, test any removable adhesive on an inconspicuous spot and remove it slowly after a day.
Lights, then ribbon
If you take nothing else from me, take this order: lights first, ribbon second. It keeps everything cleaner and you do not end up fighting wires around bows.
Lights: weave, do not spiral
For a high-end look, weave lights through the greenery instead of wrapping them like a candy cane.
- Battery lights: easiest for stairs because you avoid cords, just hide the battery pack behind the bottom newel or in the garland near an anchor
- Plug-in lights: start near the outlet and work away, securing excess cord neatly along the inside of the rail so nothing crosses the walking path
Keep lights on the side away from hands so the wire does not snag sleeves.
Ribbon: add clusters
I like ribbon best when it is not perfectly continuous. Create “moments” instead.
- Cut 3 to 5 ribbon strips (18 to 30 inches each).
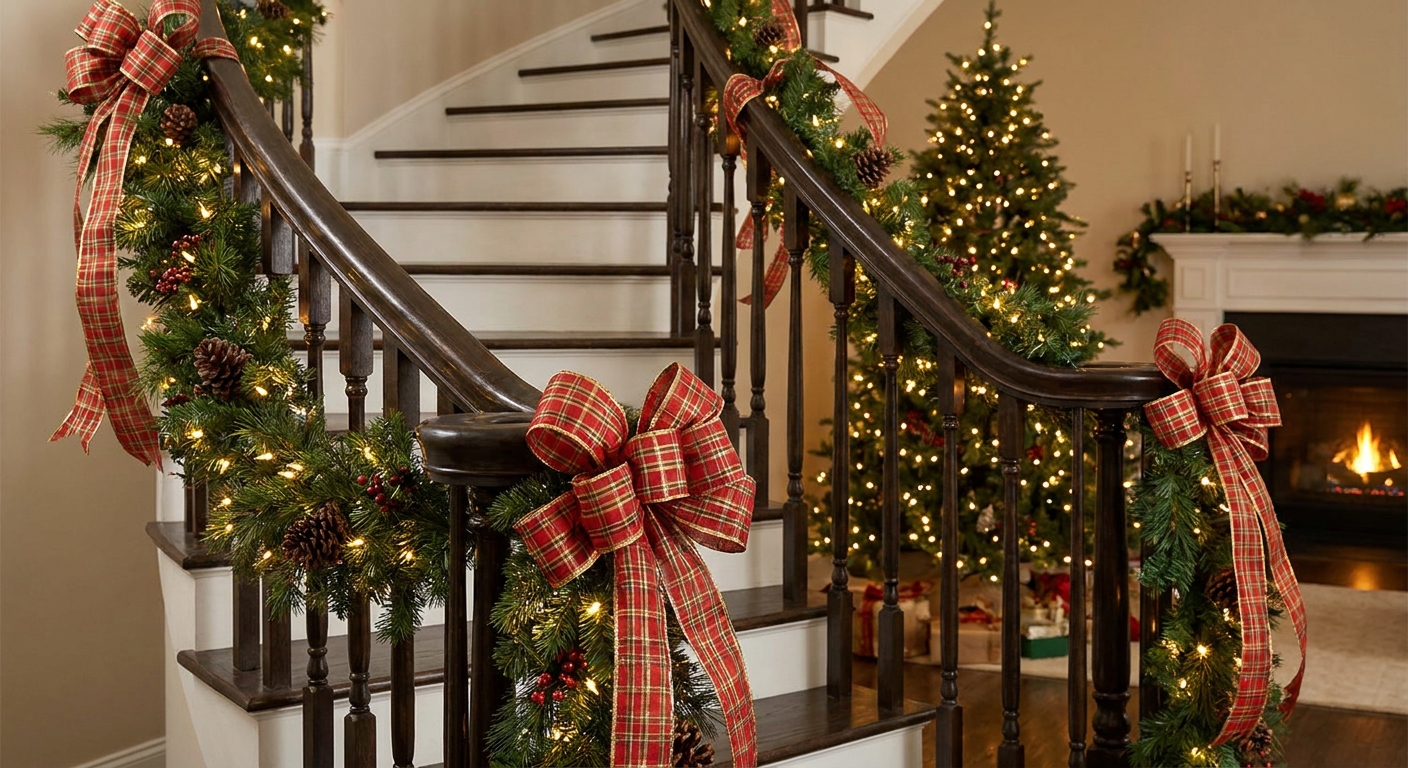
- Pinch the center like a bow and tuck it into the garland at each anchor point.
- If you want a single flowing ribbon, loosely weave it in and out and secure it at anchors with small ties.
Make it look full
If your garland is sparse, you do not need to start over. You just need strategic pouf.
My fill-in formula
- Double up: layer a second thinner garland on top of the first, attaching them together at the anchor points
- Add picks: tuck in cedar, pine, berry, or eucalyptus picks every 12 to 18 inches
- Cover joints: if you are connecting multiple garlands, overlap by 6 to 12 inches and hide the seam with a pick cluster or ribbon bundle
Balance tip: Keep the fullness consistent. If the bottom section is lush and the top is skinny, it reads unfinished even if it is technically complete.
Keep it safe
- Handrail clearance: leave a comfortable gripping area and avoid scratchy wire ends
- Trip hazards: nothing should dangle into the stair tread area
- Kid and pet check: avoid low-hanging ornaments that can be pulled down
- Fire safety: keep garland away from candles and heat sources, and use lights rated for the location you are using them
Troubleshooting
My swags look uneven
- Check that your anchor spacing is consistent.
- Measure one swag depth, then match it all the way up.
- Adjust by moving the anchor point slightly rather than tugging the middle.
The garland keeps sliding
- Add an anchor at the midpoint of each long section.
- Use a non-slip buffer like a small felt square where the garland touches the rail.
- Make sure your ties are snug, especially at newel posts.
The handrail feels blocked
- Shift the garland to the outside edge of the banister.
- Choose shallower swags and add fullness with picks instead.
My garland looks flat
- Fluff more than you think you need to, especially on the underside of each swag.
- Layer a second garland or add pick clusters at anchor points.
- Use ribbon bundles to create volume in thin spots.
Quick FAQ
Start at the top or bottom?
I prefer starting at the bottom because it sets a clean welcome point and it is easier to keep tension consistent as you work upward. Start at the top if your power source for plug-in lights is at the top landing.
How do I connect multiple garlands?
Overlap the ends by 6 to 12 inches and secure them together with a zip tie or floral wire at an anchor point. Then hide the join with a ribbon cluster or a few greenery picks.
Can I use real garland on a staircase?
Yes, just expect some shedding and plan on a shorter indoor lifespan (often about 1 to 2 weeks, depending on the greenery and how warm your house is). If you want it to last longer, keep it away from heat vents, and consider using anti-desiccant spray. Light misting can help a little, but it is not true hydration unless the cut ends have water access. If you can, keep cut ends in water at the start or end (for example, tucked into a bucket at a newel post).
One more real-garland note: sap and resin happen. I always use a buffer anywhere greenery touches a finished rail.
Will removable hooks damage paint or stain?
They can if removed too quickly or used on delicate finishes. Follow the package instructions, avoid placing on fragile or peeling paint, and remove slowly by stretching the tab straight down.