From chargers to centerpieces, here’s how to build a gorgeous, layered Christmas table that looks intentional, not overdone. Includes palette ideas, stylin...
The Festive Dwell
Thanksgiving Tablescape, Step by Step
Build a show-stopping Thanksgiving tablescape with easy, layered steps: runner, chargers, centerpiece, place settings, and glow. Budget-friendly tips included.

Clara Jenkins
Clara Jenkins is a former visual merchandiser and lifelong holiday enthusiast who believes every season is worth celebrating. She helps readers transform their everyday spaces into magical, welcoming homes through budget-friendly DIYs, elegant tablescapes, and clever styling tricks. When she isn't untangling fairy lights or hot-gluing autumn wreaths, Clara can be found hunting for vintage ornaments at local flea markets.
Published October 17, 2026
Updated October 17, 2026
If Thanksgiving decorating makes you feel like you need a professional styling team and a storage unit full of pumpkins, I promise you do not. The secret is layering in a specific order, making a few confident choices, and repeating them down the table so everything looks intentional. I learned this doing visual merchandising for years, and it works just as well in a real home where someone will absolutely spill gravy.
Below is my step-by-step method for building a tablescape that looks “special occasion” from every seat, without turning dinner prep into a craft marathon.
Start with a simple plan
Before you pull out every leaf garland you own, decide three things. This keeps your table cohesive and keeps you from overbuying.
- Palette (pick 2 to 3 colors): Cream + copper + sage is timeless. Or try white + amber + deep burgundy for a moodier look.
- Metal (pick 1): Gold, brass, copper, silver, or black. One metal instantly makes the table feel polished.
- Vibe: “Classic harvest,” “modern neutral,” “rustic woodland,” or “moody candlelit.” Your vibe decides whether you reach for plaid, velvet, or clean linen.
My rule: If your dinnerware has a pattern, go quieter with linens. If your linens are bold (plaid, embroidered), keep plates simple.
Step 1: Set the base layer
This is where you decide how formal you want to go.
- For an elevated look: Use a tablecloth with a drop that lands around chair-seat height, give or take depending on your table. Linen-look cotton reads expensive and washes well.
- For a casual, warm look: Skip the cloth and let a wood table show. Add felt pads under chargers to prevent scratches.
- For a too-small table: A tablecloth can visually “extend” the surface and make tight seating feel less cramped.
If you have a gorgeous wood table, I love letting it be the neutral backdrop. The rest of your layers will pop more.
Step 2: Add your runner
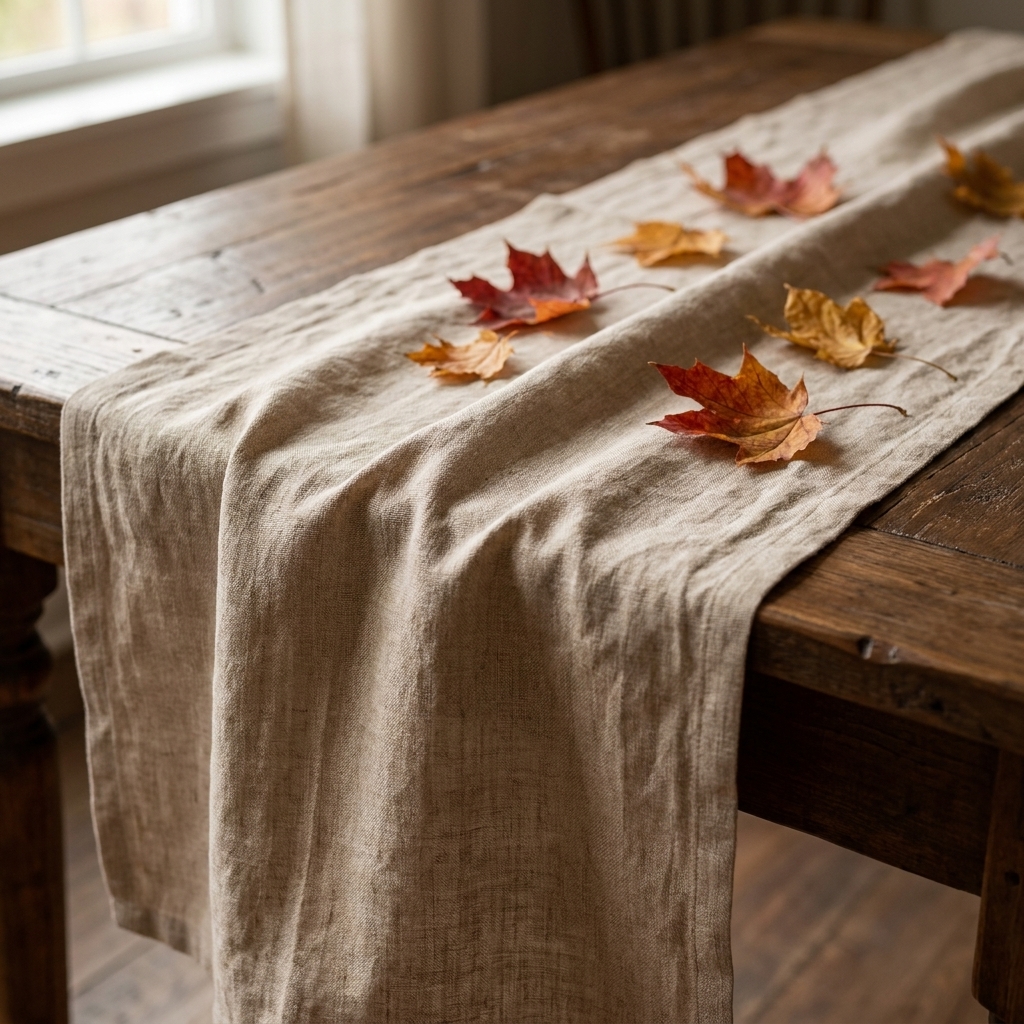
A runner is the easiest way to make the table feel styled, and it gives your centerpiece a runway. You have three options:
- Classic runner: Centered, with 6 to 12 inches hanging off each end.
- Two runners crosswise: Great for round or square tables and it gives every place setting its own “lane.”
- Garland runner: Use real or faux greenery, then tuck in accents.
Quick styling trick: Ironing is optional in my house. If your runner is wrinkly, lightly mist it with water and toss it in the dryer for 10 minutes, then lay it down right away.
Step 3: Place chargers
Chargers are the “frame” for your plates. They signal a holiday meal before anyone even sits down.
- Size guide: Most chargers are 12 to 14 inches wide.
- Material ideas: Woven seagrass (cozy), hammered metal (glam), wood (rustic), or matte black (modern).
- Color tip: If your plates are white, a darker charger creates instant contrast. If your plates are patterned, keep the charger quiet and textured.
Budget move I swear by: Buy chargers secondhand. People donate sets after one season all the time, and a little wipe-down later they look brand new.
Step 4: Build a low centerpiece
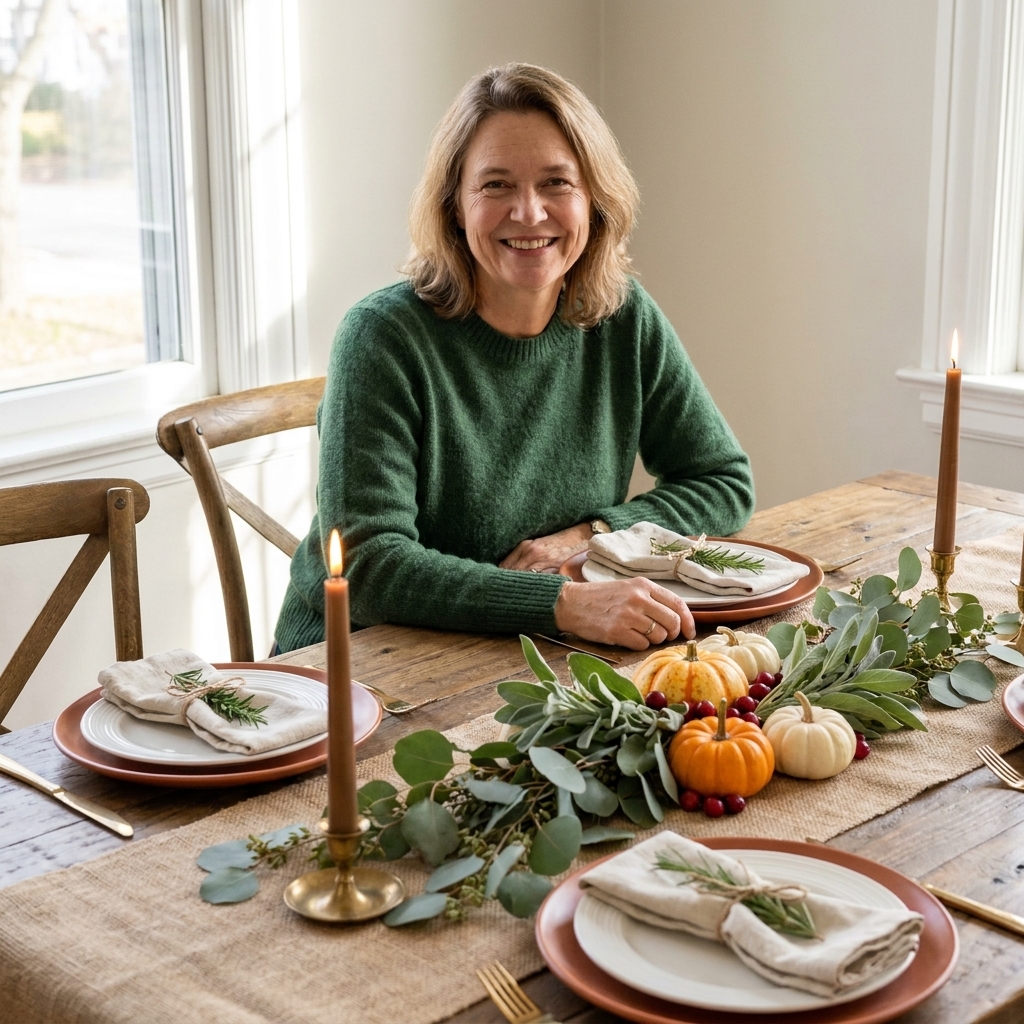
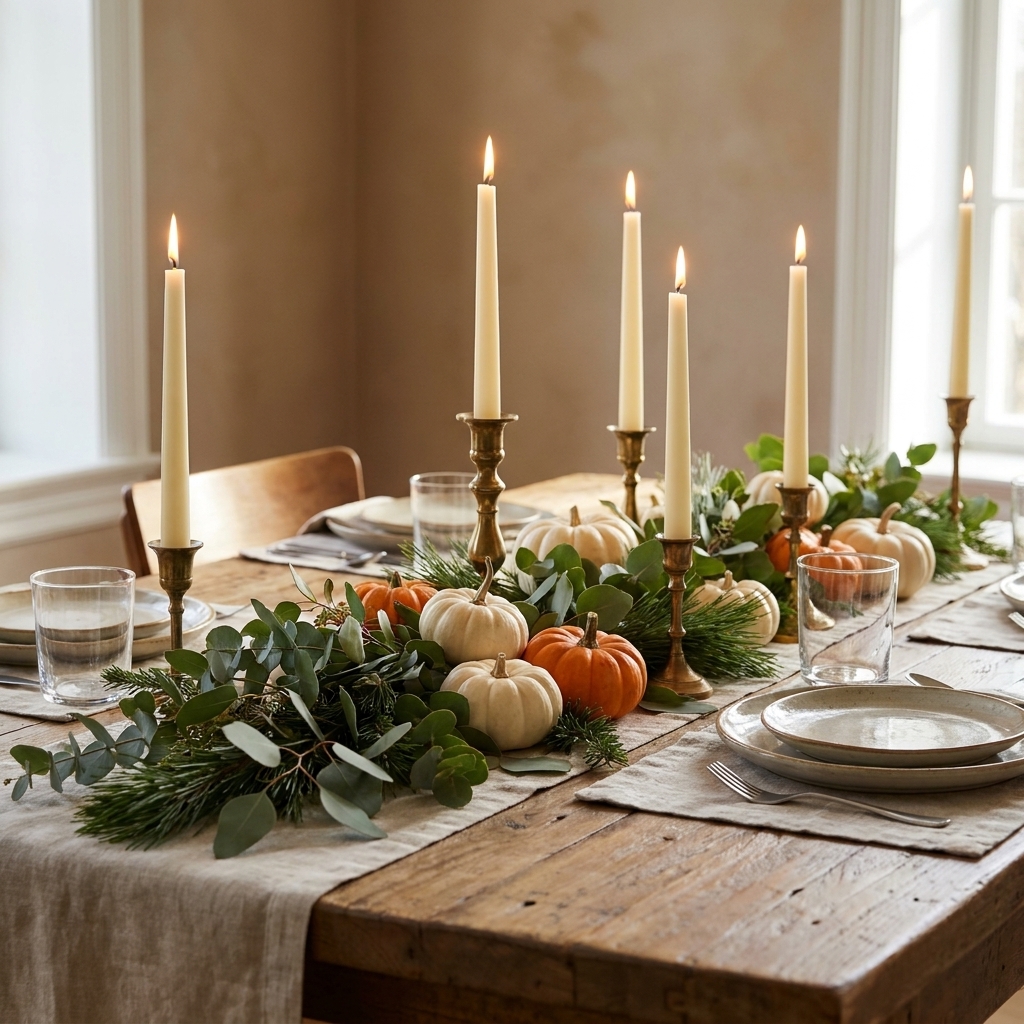
The best Thanksgiving centerpiece is low, wide, and layered, so everyone can see each other. Think “meadow,” not “tower.”
My foolproof formula
- Base: A garland, a line of eucalyptus, or a few handfuls of grocery-store greenery (seeded eucalyptus, olive, ruscus).
- Shape: Add small pumpkins or gourds every 10 to 14 inches.
- Height variation: Add two to four candleholders (not one lonely candle) so the eye moves down the table.
- Shine: Tuck in brass votives or mercury glass, or add a couple of pears for a soft glow effect when the candles hit.
If you love florals, keep them short and loose. A few bud vases spaced along the runner look abundant without blocking sightlines.
Centerpiece by table shape
- Rectangular: One continuous runner centerpiece (best for “wow” factor).
- Round: One low bowl arrangement plus a ring of candles or mini gourds around it.
- Square: A tight cluster in the center, then keep place settings extra tidy so it does not feel crowded.
Step 5: Add plates in order
Layering plates is like layering an outfit. The base piece (charger) stays put, then you build.
- Charger
- Dinner plate
- Salad plate or soup bowl (optional, but it reads instantly “holiday”)
If you are short on dishes: Skip the extra plate and add a bread plate only if you have it. Or create the layered look with a folded napkin and place card on top of a single dinner plate.
Step 6: Let napkins do more
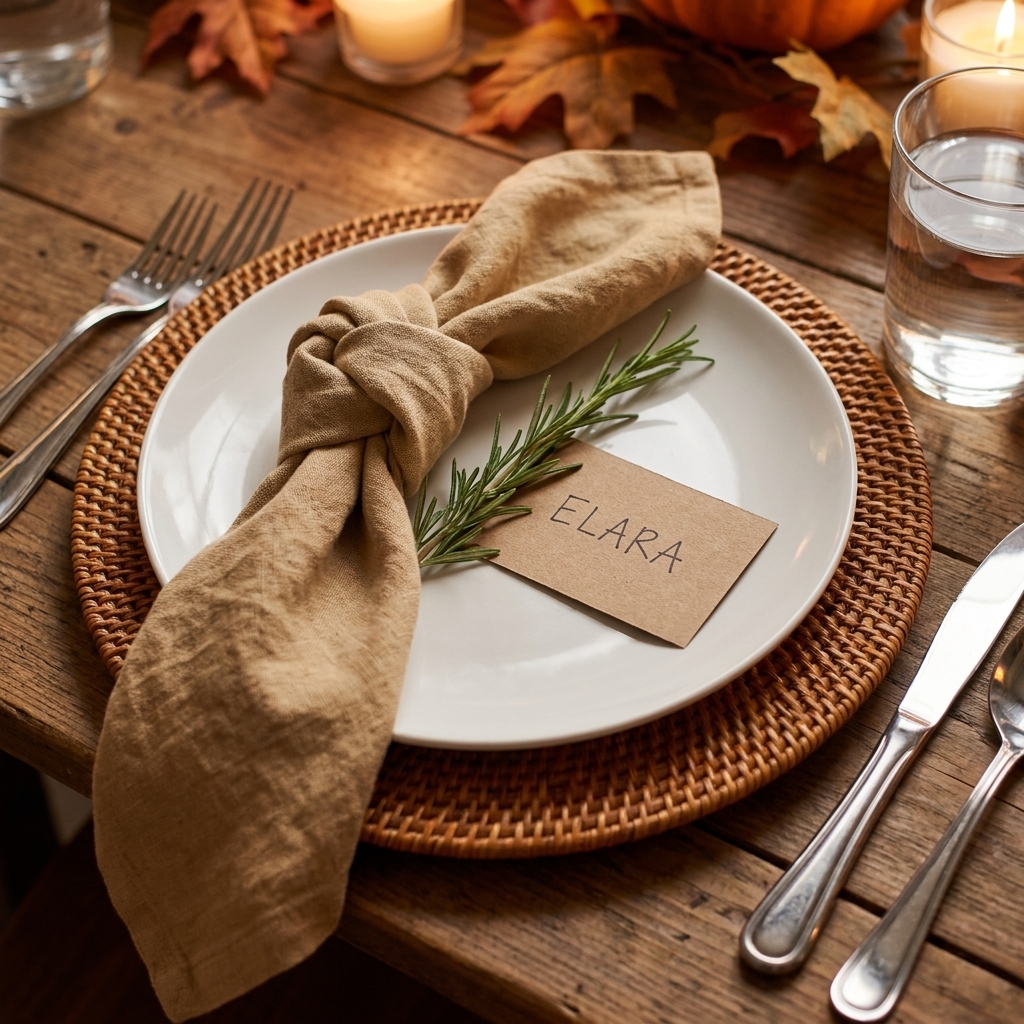
Napkins are my favorite “big impact, small effort” tool. Choose fabric if you can. Even inexpensive cotton napkins look elevated once they are pressed or neatly folded.
- Easy folds: A relaxed rectangle, a simple knot, or a fan fold.
- Napkin rings: Use what you have. Ribbon, twine, a wooden bead ring, or a sprig of rosemary tucked under the fold all count.
- Place card moment: Slide a name card into the knot or tuck it under the napkin ring.
My go-to combo: Neutral napkin (oatmeal, cream, or taupe) plus a single seasonal detail like rosemary, a cinnamon stick, or a small leaf.
Step 7: Flatware and glasses
Use what you own, then “upgrade” with how you place it.
- Flatware basics: Traditionally, forks go on the left, knife and spoon on the right. Knife blade faces the plate.
- Styling option: If your table is narrow, place dessert fork and spoon horizontally above the plate to save space.
- Glassware basics: Traditionally, the water glass goes above the knife, with the wine glass slightly to the right.
Warm tip for hosts: If you only have one type of glass, make it look deliberate by repeating it at every seat and adding sparkle elsewhere with candles.
Step 8: Add the glow
Lighting is what turns “pretty table” into “core memory.”
- Tapers: Best for drama and height. Keep them out of reach of sleeves and center them in sturdy holders.
- Votives: Best for easy ambience and safety. Cluster them in odd numbers.
- String lights: Battery micro-lights woven through greenery look magical, especially at dessert.
Safety note: Real greenery can dry out near heat. Dried eucalyptus can be especially flammable, so keep flames well away from greenery and never leave candles unattended. If your dinner runs long, I prefer LED tapers in the middle and real candles on a sideboard.
Step 9: Make room to serve
How you serve dinner should shape how you decorate.
- Family-style: Keep the centerpiece narrow and low so platters can pass easily. Use fewer votives so there is less to dodge.
- Buffet or sideboard-style: You can go a little fuller in the center, since the table is mostly for plates and conversation.
Step 10: Do the walk-by test
Before guests arrive, walk around the table like you are coming in from the kitchen with a platter. If anything catches, snags, or wobbles, fix it now.
- Trim tall stems that block faces.
- Make sure serving dishes have landing space.
- Check that place settings are evenly spaced.
One restraint rule: Stop when you have three strong moments. For example: beautiful runner, gorgeous centerpiece, and special napkins. Everything else should support those, not compete.
Two tablescape recipes
Classic harvest
- Palette: Cream, rust, and olive
- Runner: Oatmeal linen
- Chargers: Woven seagrass
- Centerpiece: Greenery + mini orange gourds + brass tapers
- Napkins: Rust cotton with twine and rosemary
- Extras: A few apples tucked near candleholders
Modern neutral
- Palette: White, tan, and black
- Runner: Cream gauze or soft muslin
- Chargers: Matte black or dark wood
- Centerpiece: White pumpkins + eucalyptus + clear glass votives
- Napkins: Taupe linen with a simple knot
- Extras: One statement element, like a black taper every 12 inches
Budget upgrades
- Repeat one “hero” item: Buy just three to five brass candleholders and repeat them down the center. Repetition reads luxe.
- Forage smart: Use fallen branches, pinecones, or leaves as texture. Give them a rinse and let them dry completely.
- Shop your house: Pull in matching vases, little bowls, or candlesticks from around the home for one night.
- Use grocery flowers like a pro: Buy two bunches of one flower (like mums), split them into bud vases, and scatter them.
Common mistakes
- Too tall in the middle: Swap tall florals for bud vases or low bowls.
- Too many colors: Remove one color completely and repeat the remaining tones in napkins and candles.
- Centerpiece takes over serving space: Move part of the decor to a sideboard and keep the table functional.
- Everything matches too perfectly: Add one natural texture, like wood, greenery, or linen, to soften it.
Quick FAQ
How early can I set the table?
You can set everything except food and fresh greenery 1 to 2 days ahead. If you are using real greenery, add it the morning of, especially if your home runs warm.
How do I decorate a small table without crowding it?
Go vertical at the edges, not the center. Use slim candlesticks and keep the centerpiece to a single garland or a tight cluster of mini pumpkins. Consider placing water glasses on a sideboard and setting them out right before dinner.
What should I do if I do not have chargers?
No problem. Use a woven placemat as the base layer, or skip straight to dinner plates and make the napkin moment your “wow.”
How do I make mismatched dishes look intentional?
Unify with one consistent layer: matching napkins, matching chargers, or matching glassware. When one element repeats perfectly, the mix looks curated instead of random.
Final hosting pep talk
Your guests will remember the warmth, the glow, and how it felt to sit down together. A beautiful tablescape is not about perfection. It is about creating a setting that says, “I am so glad you are here.” Layer with intention, keep the centerpiece low, and let candlelight do the heavy lifting.