Make a magical first impression with garland-draped stairs, lantern lighting, a hot cocoa landing zone, and easy, elegant foyer styling tricks for your Chris...
The Festive Dwell
Outdoor Patio Lights for a Summer Party
Learn how to safely hang outdoor bistro lights and style them with lanterns, candles, and summer decor for a magical backyard evening party.

Clara Jenkins
Clara Jenkins is a former visual merchandiser and lifelong holiday enthusiast who believes every season is worth celebrating. She helps readers transform their everyday spaces into magical, welcoming homes through budget-friendly DIYs, elegant tablescapes, and clever styling tricks. When she isn't untangling fairy lights or hot-gluing autumn wreaths, Clara can be found hunting for vintage ornaments at local flea markets.
Published October 17, 2026
Updated October 17, 2026
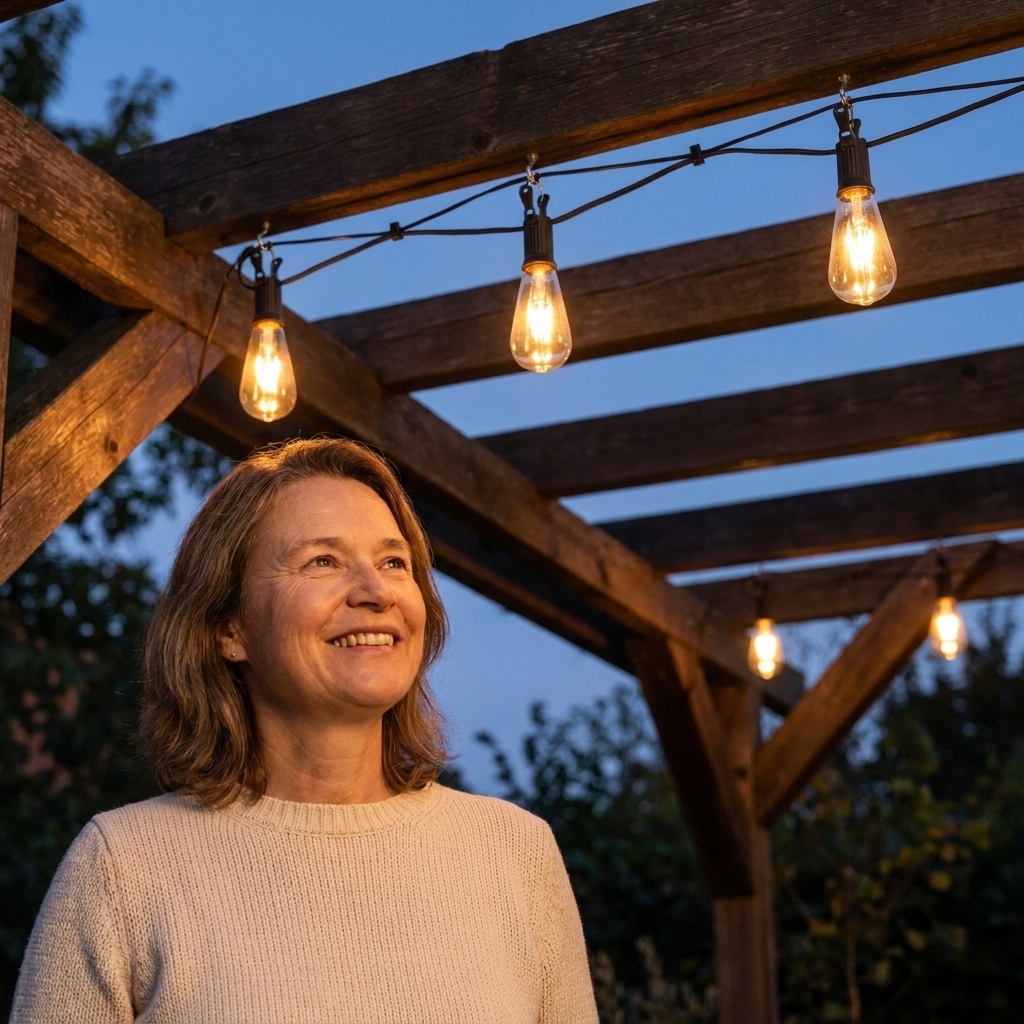
There is nothing like that first click of the switch when your patio lights glow on and suddenly your backyard feels like a little seaside cafe. If you have ever stood outside at dusk holding a tangled strand of bistro lights and wondering where to even start, you are in the right place. I used to install these setups for seasonal displays all the time, and the secret is not fancy tools. It is a simple plan, safe connections, and a few styling layers so it feels intentional, not like you just tossed lights into the sky.

Before You Hang Anything: Safety and Shopping Checklist
Outdoor lighting is one of those areas where I go full organized-mom energy. A cute party is not worth a tripped breaker or a melted extension cord. Do this quick check before you start.
Choose lights rated for your space
- Outdoor rating: Look for an outdoor rating on the packaging. If your lights will be fully exposed to rain, go with a wet-location rating. If they will live under a covered patio where they can still get humidity and splashes, a damp-location rating is often appropriate. When in doubt, choose wet-rated.
- Bulbs: LED is my go-to for patios. They stay cooler, use less energy, and are less likely to shatter if bumped.
- Length and spacing: Measure first (details below), then buy one continuous run when possible. Fewer connections means fewer failure points.
Do a quick electrical reality check
- Check the label: Look at the strand wattage or amps and your manufacturer notes on how many strands can be linked. Some sets are linkable, some are not.
- Do not guess on capacity: Make sure your extension cord is rated for outdoor use and rated for the load. If you are not sure, scale back or ask an electrician. It is not the place to wing it.
- Spread out the power when needed: If you are running lights plus a speaker plus a cooler plus a bug fan, consider using a different outlet or circuit for the extras.
Use the right extension cord and plug protection
- Extension cords: Use a heavy-duty outdoor extension cord (not an indoor white cord). Avoid daisy chaining multiple cords if you can.
- GFCI protection: Plug into a GFCI outlet. If you are not sure, test the outlet. If you do not have one outdoors, consider a portable GFCI adapter.
- Keep connections dry: Use an outdoor connection cover or weatherproof box where your plug and extension cord meet, especially if connections are on the ground.
Pick sturdy support points
- Strong anchors include a house fascia board, deck posts, a sturdy pergola, mature trees, or dedicated light poles.
- Avoid flimsy gutters or weak branches that sway a lot. Movement is a big cause of sagging over time, and it can also stress sockets and hardware.
One common mistake to avoid
- Do not staple or nail through cords. Use hooks, clips, or proper outdoor cable fasteners that do not pierce insulation.
- Follow your manufacturer instructions for installation, linking limits, and support recommendations.
Plan Your Layout Like a Pro
When lights look “effortless,” it is usually because someone planned the shape. Here are the three layouts I use most for summer parties.
1) Zigzag canopy
This is the classic bistro look. Lights travel back and forth across a patio, creating a ceiling of glow over your table and seating.
- Best for: patios and decks with two solid sides (house to fence, pergola to posts)
- Looks like: an outdoor dining room
2) Perimeter outline
Run lights around the edges of a pergola, fence, or railing. It is neat, minimal, and very renter-friendly.
- Best for: small patios, balconies, or tight yards
- Looks like: a warm border of light
3) Center starburst
Choose one central high point (a pole, tree, or pergola center) and run strands out to the perimeter like spokes.
- Best for: open yards without lots of attachment points
- Looks like: an event space, especially over lounge seating
How to measure without overthinking it
- Sketch your patio shape on paper.
- Use a tape measure, or walk it off with a long piece of string. Follow the exact path your lights will take.
- Add 10 to 15 percent extra for gentle drape, wrapping around posts, and reaching the outlet.
My tip: If you want that relaxed cafe swoop, plan for a little slack. If you want a tighter, modern look, plan your anchor points closer together.
Tools and Hardware I Actually Use
You do not need a garage full of equipment. This short list covers most patios.
- Outdoor bistro lights (commercial-grade is worth it if you hang them season after season)
- Outdoor extension cord and a weatherproof connection cover
- Screw hooks or eye bolts (for wood posts and pergolas)
- Masonry anchors (only if attaching to brick or stucco)
- Zip ties (UV resistant) for temporary or fence attachments
- Guide wire (optional but amazing for long spans) plus turnbuckles if you want it taut
- Ladder, measuring tape, pencil, drill
Quick notes by surface
- Vinyl siding: Skip drilling. Use siding hooks designed to tuck into the seam, or hang from trim you can safely fasten into.
- Metal pergolas: Look for outdoor-rated clamps or beam clips made for metal framing, and avoid anything that will rust or slip.
- Fences: Clips or UV zip ties work well, just do not overtighten and warp boards.
- Trees: Use wide straps or soft ties around branches so you do not bite into bark. Leave room for natural movement and growth.
How to String Bistro Lights Step by Step
This is my tried-and-true order of operations. It keeps you from having to redo work halfway through, which is the fastest way to lose your decorating joy.
Step 1: Find power first
Identify your outlet and decide where the strand will start. If possible, start near the outlet so you are not stretching cords across walkways.
Step 2: Mark your anchor points
Use a pencil to mark where hooks or attachment points will go. Keep your first line straight. It sets the tone for the entire canopy.
Step 3: Install hooks or attachment hardware
- For wood: pre-drill a small pilot hole, then screw in hooks or eye bolts.
- For masonry: use proper anchors rated for outdoor use.
Height guide: 8 to 10 feet is a common target for patios, but adjust for your space, sight lines, and clearance. Over dining areas, prioritize comfort so tall guests can stand easily underneath.
Step 4: Add guide wire for longer runs
If you have longer unsupported runs, heavier bulbs, a windy yard, or you have ever looked up and thought “why is that drooping,” a guide wire is your best friend. String lights are not meant to carry heavy tension by themselves, and your manufacturer may specifically recommend a support wire.
- Secure the wire between two strong anchors.
- Tighten with a turnbuckle if needed.
- Then attach the lights to the wire using light clips or UV zip ties.
Step 5: Hang the lights and shape the drape
Start at your power end and work outward. If you are doing a zigzag canopy, hang one run at a time so your spacing stays consistent.
- Keep the drape even by stepping back every few attachment points to eyeball it.
- Avoid pulling too tight. Gentle curves look inviting, and they reduce strain on sockets.
Step 6: Secure cords and protect connections
Keep cords out of pathways. If a cord must cross an area where people walk, reroute it or cover it with a proper outdoor cord cover rated for foot traffic. Place plug connections in a weatherproof cover and elevate them slightly off the ground if you can.
Step 7: Test, then add a timer or smart plug
Test everything before the party day. I love an outdoor timer or smart plug so lights come on automatically at golden hour, like magic.
Styling Lanterns With Patio Lights
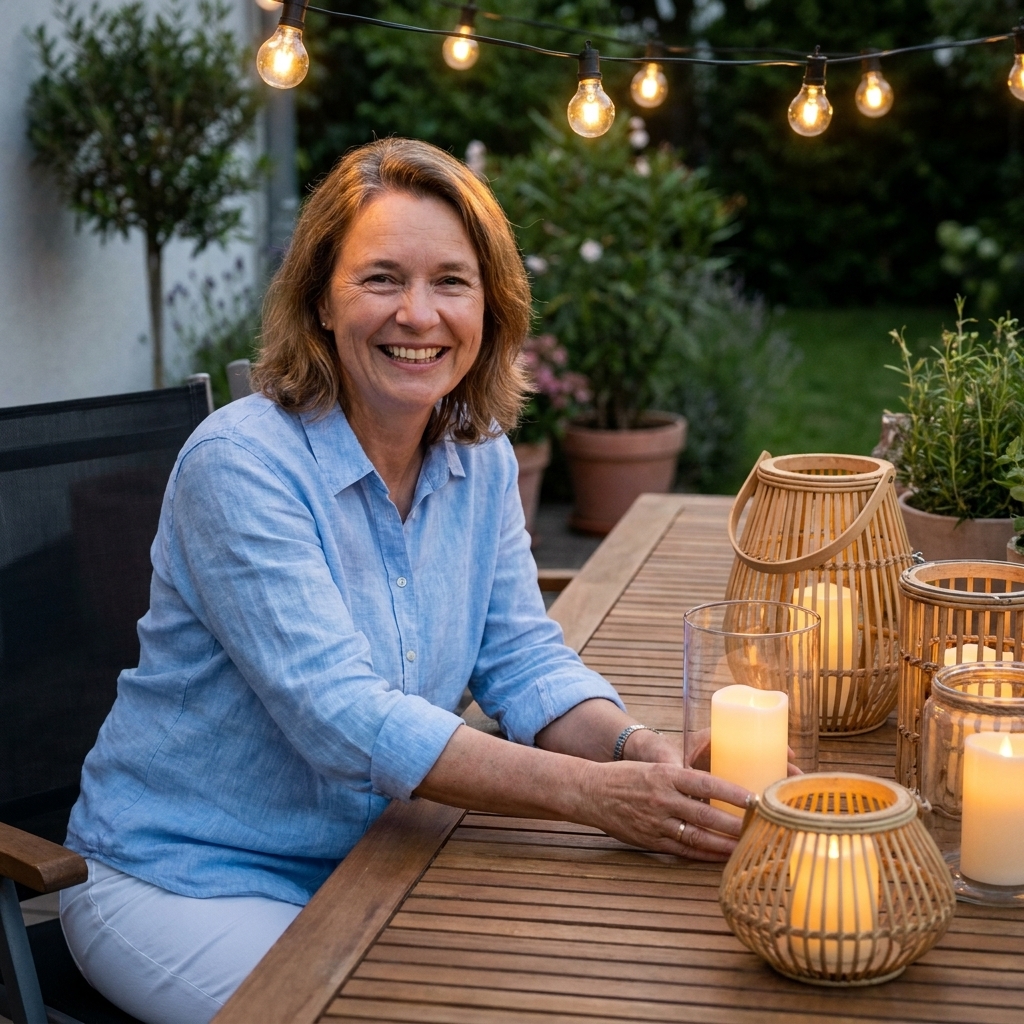
Bistro lights give you the ceiling glow. Lanterns give you depth and that layered, hosted feel. Think of it like styling a mantle, but outside: you want different heights and pockets of light around the space.
Pick a lantern mix that feels summery
- Woven rattan or bamboo lanterns: warm, beachy, relaxed
- Black metal lanterns: crisp and classic, great with white cushions and greenery
- Glass hurricane lanterns: breezy and elegant, especially with real candles (weather permitting)
Use the 3 heights rule
To make it look styled, not scattered, aim for three levels of light:
- Overhead: your bistro lights
- Mid-level: lanterns on tables, benches, or steps
- Low-level: lanterns on the ground along pathways, corners, and near seating
Where lanterns look best
- Entry moment: two lanterns at the gate, patio door, or steps (instant “welcome”)
- Dining zone: one or two medium lanterns plus low votives or tea lights
- Lounge corner: cluster three lanterns in different sizes beside a chair or outdoor sofa
- Pathway: small lanterns every few feet to guide guests
Candles: real or flameless?
- Flameless LED candles are my default for parties with kids, pets, or lots of movement.
- Real candles are gorgeous in glass hurricanes on calm nights. Keep a lighter handy and place them where they will not be bumped.
Make It Feel Like a Summer Party
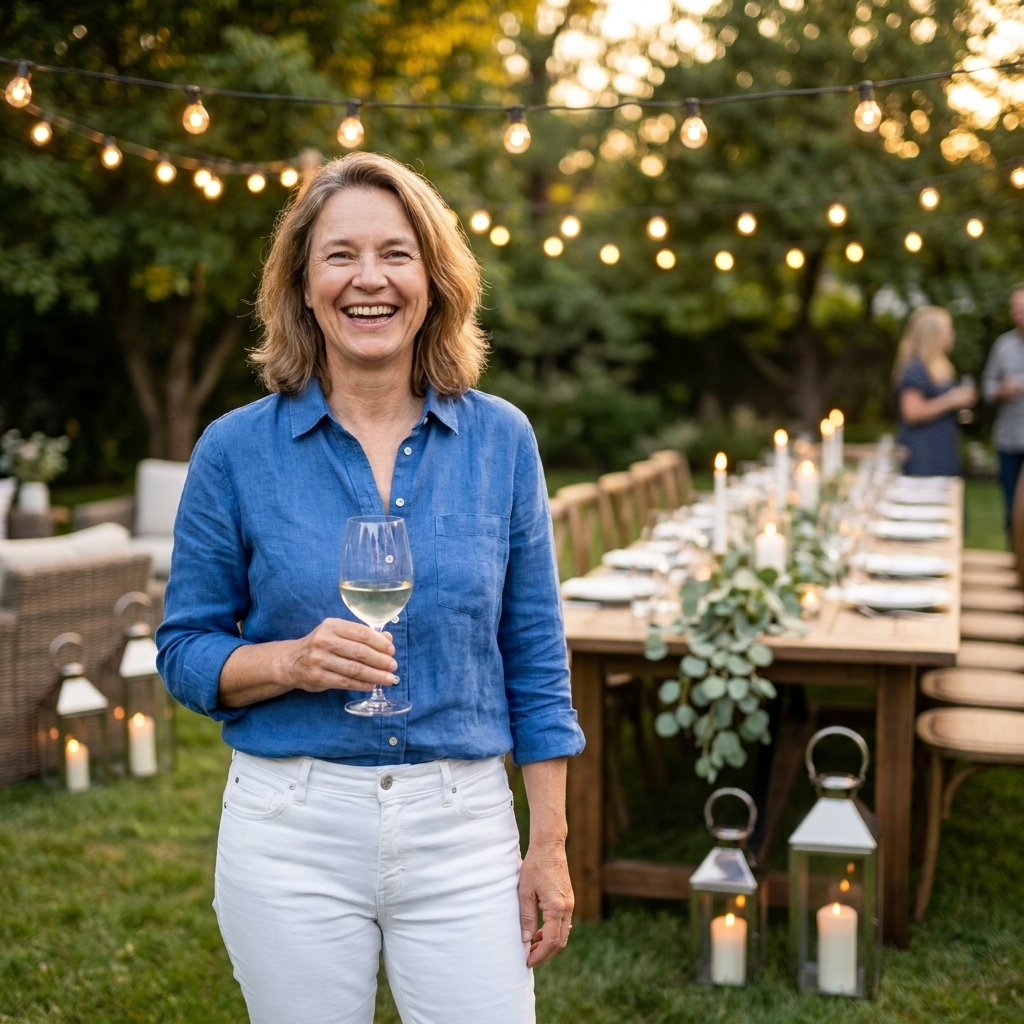
Once your lighting is up, you are 80 percent done. The last 20 percent is what makes guests say, “Okay, this is cute.” Here are my favorite fast add-ons.
Color palette shortcuts
- Citrus summer: white, lemon yellow, leafy green, a pop of coral
- Coastal evening: navy, white, natural woven textures, clear glass
- Garden party: soft pink, ivory, sage, mixed florals
Easy decor layers
- Foraged greenery: tuck eucalyptus, olive branches, or backyard clippings along the center of the table
- Outdoor-friendly linens: a simple runner instantly upgrades plastic or weathered tables
- Glassware glow: use clear glasses and pitchers so they catch light
- Bug strategy that does not ruin the vibe: citronella in pretty vessels, a discreet fan near seating, and covered drinks
Weatherproofing and Party-Proofing
Summer nights can be unpredictable. A few small precautions keep your setup safe and stress-free.
- Wind: If your lights swing, add an extra anchor point or use a guide wire. Secure lanterns with heavier bases in breezy areas.
- Rain: Unplug lights during storms. Make sure connections are protected and off the ground.
- Heat: Keep cords out of direct sun when possible, and do not bury them under rugs where heat can build.
- Traffic flow: Walk your yard like a guest would. Remove tripping hazards, and light any step changes with a lantern.
Quick Troubleshooting
My lights sag in the middle
- Add a guide wire, or add an intermediate anchor point on a post or tree.
- Do not pull the strand itself tight enough to strain sockets.
Half the strand is out
- Check if your strand has multiple sections that can loosen at a connection point.
- If you use replaceable bulbs, test and tighten them (with the power off).
The breaker or GFCI trips
- Unplug and reduce the load. Too many strands on one circuit can do it.
- Check for moisture at plug connections, especially after rain or heavy dew. Dry everything fully before trying again.
- Inspect for damaged insulation, pinched cords, or cracked sockets and replace the strand if anything looks compromised.
- If your set has replaceable bulbs, a bad bulb can cause issues on some strands. With power off, reseat bulbs and look for obvious damage.
- Confirm you are using outdoor-rated cords and a GFCI outlet.
My Go-To Easy Lighting Recipe
If you want a foolproof setup for a summer evening party, this combination always works:
- Overhead: one warm-white bistro canopy over dining and lounge seating
- Dining table: one medium lantern plus 4 to 8 small votives (flameless is perfect)
- Entry: a pair of lanterns by the door or gate
- Pathway or corners: three lanterns grouped in mixed heights
- Finishing touch: a simple greenery runner and a bowl of lemons or limes for color
Once you do it once, you will realize outdoor lights are not a “special occasion only” thing. They are a whole mood, and summer is the perfect excuse to lean in.
FAQ
How high should outdoor patio string lights be?
8 to 10 feet is a common target, but the right height depends on your space and clearance needs. Make sure guests can stand and move comfortably underneath, and keep walkways especially clear.
Do I need a guide wire for bistro lights?
Not always, but it is smart for longer unsupported runs, heavier bulbs, windier yards, or any setup where you notice sagging. A guide wire supports the weight and helps prevent tension on sockets. Always follow manufacturer guidance.
Can I hang patio lights on a fence?
Yes, as long as the fence is sturdy. Use proper outdoor clips or UV-resistant zip ties, and avoid pulling the strand tight enough to stress fence boards.
What bulbs look best for a summer party?
Warm white bulbs create the most flattering, cozy glow. Clear bulbs feel classic and bright; frosted bulbs feel softer. For most backyards, warm white LED is the sweet spot.