Recreate 15 elevated Christmas tree themes with simple shopping lists: color palettes, ornament counts, ribbon lengths, plus step-by-step ribbon and bow tech...
The Festive Dwell
Upcycle Old Christmas Baubles with Velvet and Baking Soda Paint
Give scratched plastic ornaments a luxe makeover with two easy techniques: velvety flocked paint and a chic baking soda texture finish. Budget-friendly, beginner-proof, and so pretty on the tree.

Clara Jenkins
Clara Jenkins is a former visual merchandiser and lifelong holiday enthusiast who believes every season is worth celebrating. She helps readers transform their everyday spaces into magical, welcoming homes through budget-friendly DIYs, elegant tablescapes, and clever styling tricks. When she isn't untangling fairy lights or hot-gluing autumn wreaths, Clara can be found hunting for vintage ornaments at local flea markets.
Published October 17, 2026
Updated October 17, 2026
If you have a tote of old plastic baubles that are scratched, sun-faded, or just a little too "2008 shiny red," do not toss them. These are exactly the ornaments I love to upcycle, because the shape is still perfect, but the finish is begging for a glow up.
Today I am doing two finishes that look expensive on the tree: a soft velvet look (that cozy, flocked vibe you see in boutique shops) and a baking soda paint finish (a modern, stone-like texture that hides every scuff). Do one style or mix both for a collected, designer feel.
Why these finishes work
- They camouflage damage. Scratches disappear under flocking or texture.
- They elevate cheap plastic. Matte plus texture instantly reads high end.
- They are forgiving. No perfect brushwork required, which is my favorite kind of DIY.
- They play nicely with modern decor. Think moody jewel tones, creamy neutrals, and an elevated, understated vibe.
Supplies
For both methods
- Old plastic ornaments (ball or finial shapes both work)
- Dish soap and warm water
- Rubbing alcohol (optional but helpful for oily residue)
- Lint-free cloth
- Painter’s tape (optional for keeping the cap clean)
- Disposable gloves
- Skewers, chopsticks, or pencils for holding ornaments while drying
- A cardboard box or foam block to stand skewers upright
- Drop cloth or kraft paper
Velvet look options
- Option A (easiest): Velvet finish spray paint (often labeled velvet, suede, or flocked finish)
- Option B (extra plush): Acrylic craft paint plus flocking powder (or microfibers) in a matching color
- Soft paintbrush (if using acrylic)
Baking soda paint
- Acrylic craft paint (matte looks best)
- Baking soda
- Small bowl for mixing
- Stiff stippling brush, chip brush, or makeup sponge
Color tip from my visual merch days: Pick one anchor color family (for example, cream, taupe, and warm gold or forest green, ivory, and bronze). Your upcycled ornaments will look curated, not crafty.
Prep work
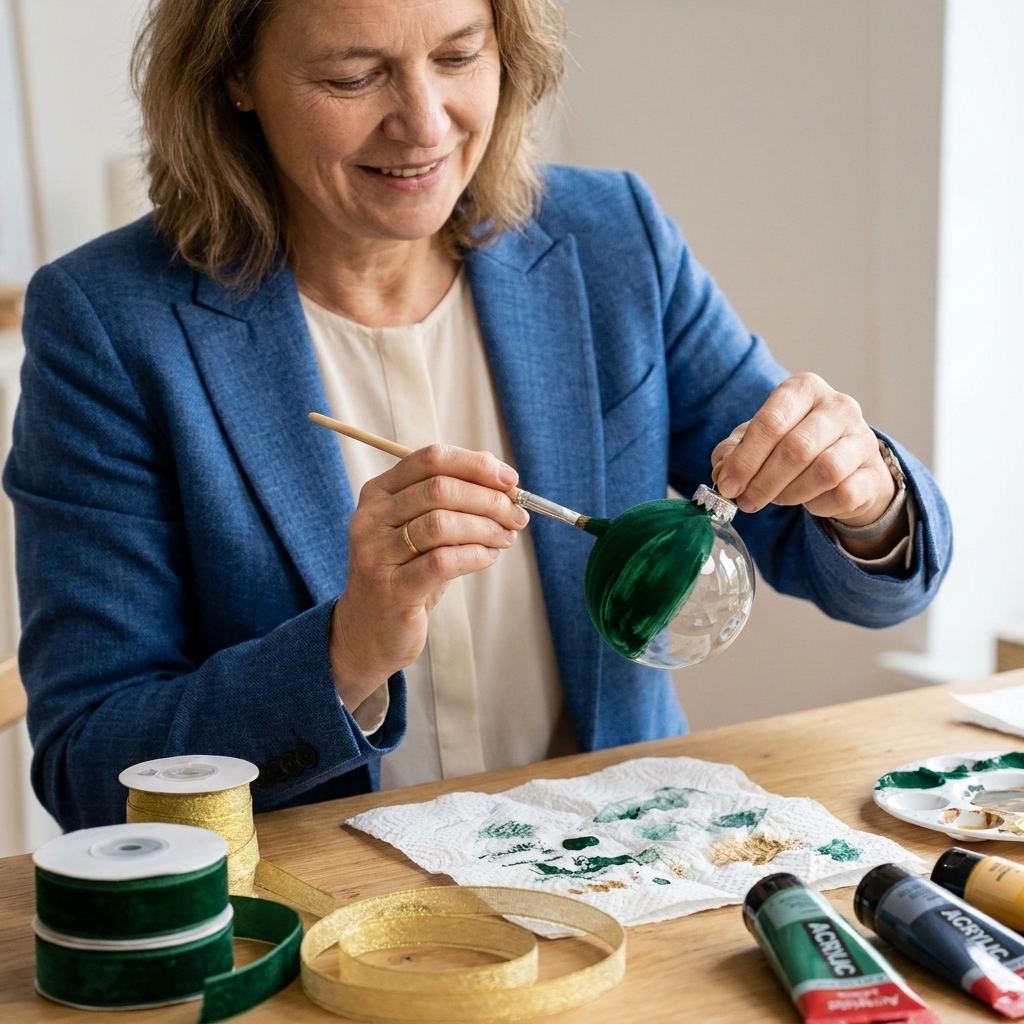
- Remove hooks and caps. Gently pinch the metal prongs and lift off the top. Set caps aside.
- Wash the ornaments. Warm water plus a little dish soap, then rinse well.
- Cut residue and coatings. If there is factory glitter, sticky label glue, or a slick clear lacquer feel, wipe down with rubbing alcohol. If glitter will not budge, that ornament is a good candidate for a bonding primer.
- Dry completely. Water droplets can ruin paint adhesion.
- Decide how you will hold them. I like sliding the ornament opening onto a skewer or pencil so I can paint without fingerprints.
- Keep the neck clean. If caps fit tightly, wrap a small ring of painter’s tape around the inside lip or the top opening so paint does not build up where the cap needs to slide back on.
Quick safety note: If you scuff sand, wear a dust mask and wipe away dust. If you spray paint, do it outdoors or in a well-ventilated space, away from open flames.
Method 1: Velvet look
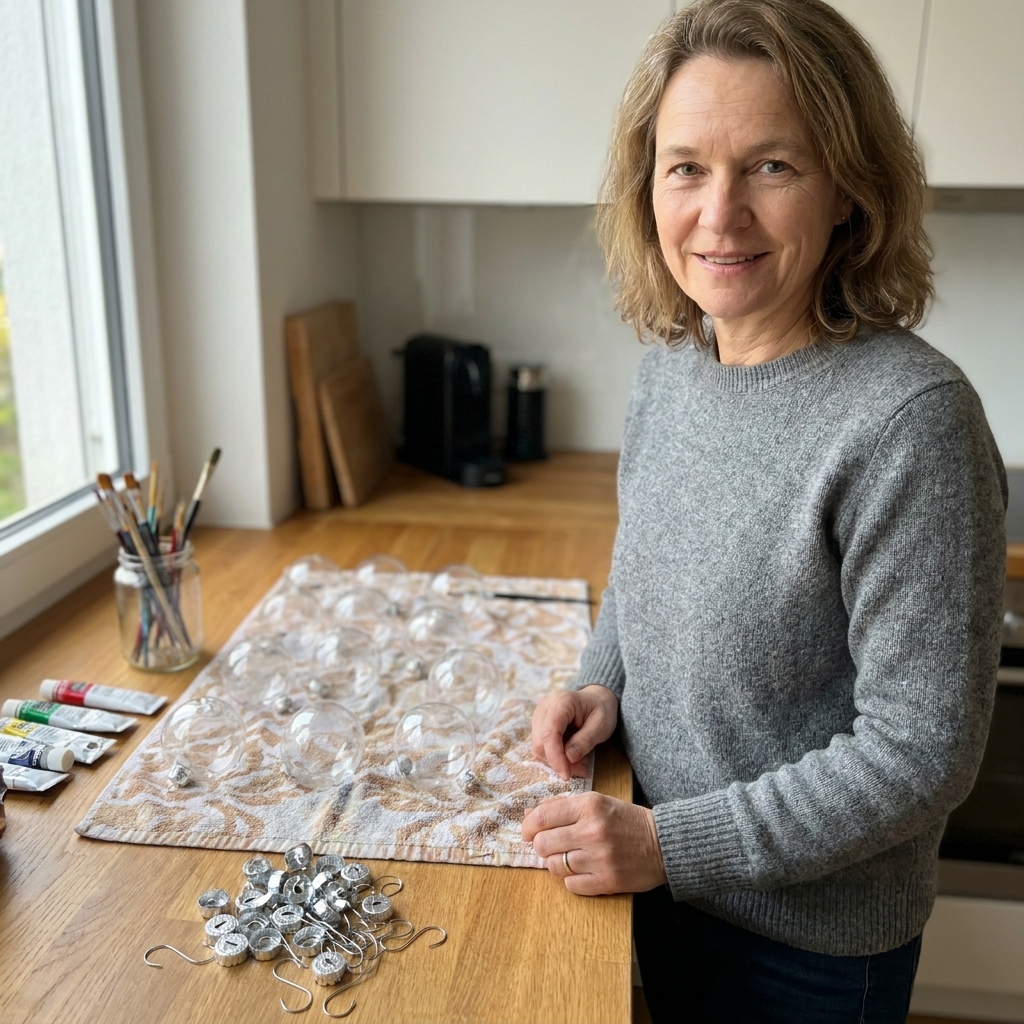
Option A: Velvet spray paint
- Ventilate and protect your space. Cover surfaces and spray outdoors or in a well-ventilated garage.
- Lightly scuff if needed. If an ornament is extremely glossy or slippery, a gentle pass with a fine sanding sponge can help. Wear a dust mask, then wipe away dust.
- Spray in thin coats. Hold the can 8 to 12 inches away and rotate the ornament as you spray. Follow your can label. Dry times vary with temperature and humidity.
- Let it flash dry. Most products want a short wait between coats (often 10 to 15 minutes), but always go by the label and how it feels to the touch.
- Cure fully. Let ornaments sit untouched for several hours, ideally overnight, before rehanging caps.
My best no-regrets tip: Do not rush the cure time. Velvet finishes feel dry quickly but can dent if you stack them too soon.
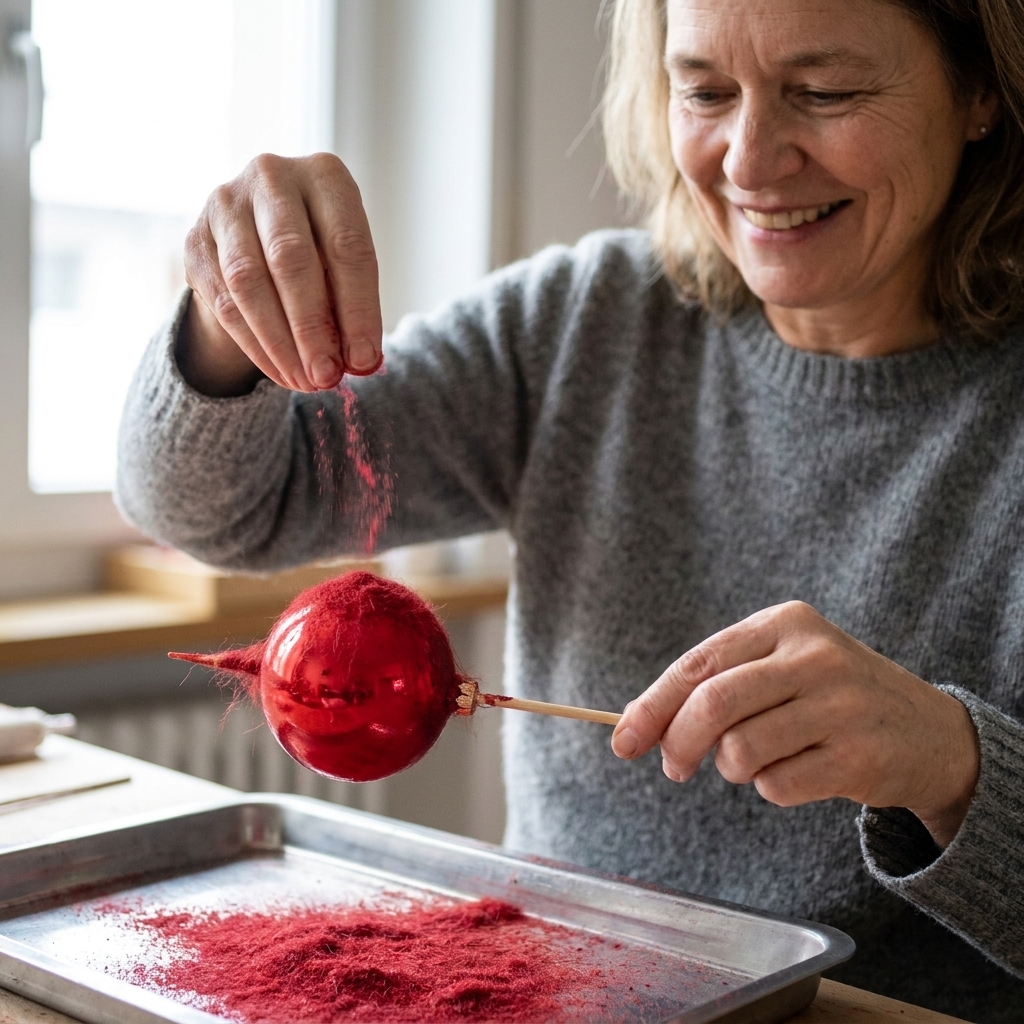
Option B: Acrylic paint plus flocking
- Paint a section at a time. Brush on a smooth, even coat of acrylic paint.
- Apply flocking immediately. Hold the ornament over a tray and sprinkle flocking powder generously while the paint is wet.
- Tap off excess. Gently tap the skewer to drop extra fibers back into your tray for reuse.
- Let it dry, then de-shed. Once fully dry, lightly tap again or very gently brush with a soft, dry brush to remove loose fibers. This cuts down on shedding later.
- Repeat if needed. If you see thin spots after drying, add a second paint layer and flock again.
- Seal (optional). Most flocking holds up fine for decorative use, but heavy handling and tight storage can increase shedding. If you want extra insurance, mist with a clear matte spray. Test first because some sealers flatten the velvet look.
Method 2: Baking soda paint
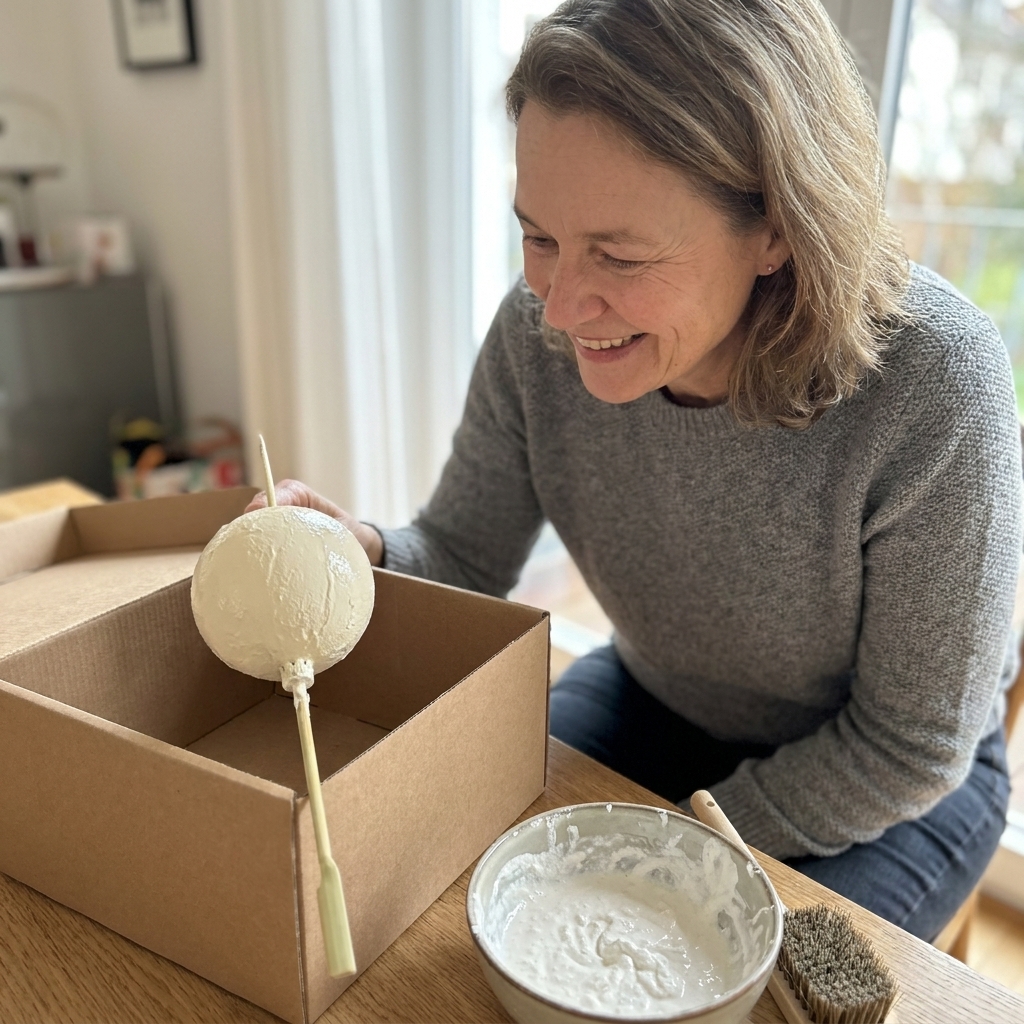
This is my go-to for the saddest ornaments in the bin, especially anything with deep scuffs or weird dents. Baking soda turns basic acrylic paint into a soft, chalky, stone-like finish that looks gorgeous with twinkle lights.
Adhesion note: Baking soda paint can adhere well, but plastic varies a lot (some slick, glossy ornaments fight every paint). If you have any doubt, test one ornament first, or use a bonding primer made for plastic.
Mixing ratios
- Smooth, subtle texture: 1 tablespoon baking soda per 1/4 cup acrylic paint
- Heavier, pottery-like texture: 2 tablespoons baking soda per 1/4 cup acrylic paint
Consistency goal: Like thick yogurt. If it gets too paste-like, add a tiny splash of water or a little more paint.
How to apply
- Stir well. Baking soda clumps, so take an extra minute to mix until smooth.
- Stipple, do not brush. Use a stiff brush or sponge to pounce the paint on. This builds texture and prevents streaks.
- Two thin coats. Let the first coat dry before adding the second. This is often 30 to 60 minutes, but humidity and paint brand can change the timing.
- Let cure overnight. It will feel dry before it is fully tough.
Finishing touches
Upgrade the hanger
- Swap flimsy hooks for velvet ribbon, satin ribbon, or twine.
- Try double-sided velvet ribbon in wine, forest, or espresso for instant polish.
Add a metallic accent
- Rub a tiny bit of gold or bronze wax (or dry-brushed metallic acrylic) around ridges and finial details.
- Keep it subtle. You want a glow, not a glitter explosion.
Do not forget the cap
- If the original cap is scratched, spray it matte gold or matte black.
- Let caps dry completely before pressing them back on.
Drying and durability
- Dry upright. Skewers stuck into a box or foam block keep ornaments from rolling and sticking.
- Avoid humid drying spots. Bathrooms and damp basements slow curing.
- Storage matters. Once fully cured, place each ornament in a paper cupcake liner or wrap loosely in tissue before nesting in a bin.
- Skip thick clear coats. Most sealers add sheen and can undo the matte magic. If you must seal, choose a matte spray and test on one ornament first.
Design ideas
In merchandising, we built families of product. You can do the same with ornaments using repetition and a little restraint.
Three easy combos
- Winter neutrals: baking soda paint in ivory, oatmeal, and warm gray plus champagne ribbon
- Moody classic: velvet ornaments in forest green and burgundy plus antique gold caps
- Modern cottage: baking soda paint in soft white plus a few velvet accents in dusty blue plus twine hangers
Easy rule: Repeat each finish at least 6 to 8 times on the tree. A few lonely textured ornaments can look accidental, but a cluster looks curated.

Common mistakes
- Overloading spray paint. Heavy coats drip and dry unevenly. Lighter passes win.
- Handling too soon. Fingerprints, dents, and flat spots happen when the surface feels dry but is not cured.
- Too much baking soda. If the finish turns crumbly or cracks, add more paint (or a tiny splash of water) and apply thinner coats.
Troubleshooting
My velvet finish looks patchy
This usually happens with heavy spray in one spot or not enough coverage. Let it dry, then add another light coat from a consistent distance, rotating the ornament slowly.
My baking soda paint is cracking
The mix is likely too thick. Add a little more paint (or a tiny splash of water) and apply in thinner coats.
The paint is peeling off the plastic
That is almost always prep. Wash and degrease well, and consider a bonding primer or a light scuff sanding for ultra glossy ornaments. Also make sure the ornament is fully dry before painting.
Can I use glass ornaments?
Yes, but handle with care. Both techniques can work on glass. Adhesion depends on the ornament and the paint, so test one first. If you want maximum durability, start with a primer that is rated for glass, then paint.
Quick FAQ
Will baking soda paint make ornaments heavy?
Not noticeably. The paint layer is thin. Just avoid piling on very thick texture if you are working with delicate branches.
Do I need primer?
Usually no if you clean well, but primer helps a lot on super slick plastics, lacquered ornaments, and anything that feels oily no matter how much you wash. Choose a bonding primer made for plastic and keep your top coat matte.
How long does this take?
Active time is about 30 to 60 minutes for a batch. Drying and curing is where patience pays off, and it varies by product and humidity. I like to craft in the afternoon and add caps and ribbons the next day.
My favorite display
Yes, they are gorgeous on the tree, but do not overlook a bowl on a coffee table or entry console. Fill a wide glass bowl with velvet and textured ornaments, add a strand of warm micro lights underneath, and you are done.
If you try this DIY, make a few extras. Upcycled ornaments are my go-to host gift, especially tied in a set of three with velvet ribbon and a little sprig of faux cedar.