A step-by-step, mix-and-match guide to building a cozy spooky front porch with pumpkins, lighting, height, and Halloween accents that look intentional, not c...
The Festive Dwell
15 Easy DIY Halloween Porch Decorations
Transform your front porch into a delightfully spooky welcome with 15 quick, budget-friendly DIY Halloween decorations, from floating witch hats to upcycled tombstones.

Clara Jenkins
Clara Jenkins is a former visual merchandiser and lifelong holiday enthusiast who believes every season is worth celebrating. She helps readers transform their everyday spaces into magical, welcoming homes through budget-friendly DIYs, elegant tablescapes, and clever styling tricks. When she isn't untangling fairy lights or hot-gluing autumn wreaths, Clara can be found hunting for vintage ornaments at local flea markets.
Published October 17, 2026
Updated October 17, 2026
My favorite kind of Halloween decor is the kind that makes your porch feel like an experience, not a storage closet exploded onto the front steps. The good news: you do not need a giant budget or a full weekend to pull off a porch that makes trick-or-treaters gasp (in a fun way). Below are 15 easy DIY Halloween porch decorations that come together fast, use common supplies, and still look polished.

Before you start: my 10-minute porch plan
- Pick a palette: black + orange, black + white, or moody neutrals (cream, twig brown, deep green).
- Layer lighting: one overhead glow (porch light), one mid-level glow (lanterns), one low glow (battery candles).
- Choose 1 wow moment: floating hats, a big arch, or a dramatic doorway frame.
- Keep pathways clear: especially if you have steps. Use flameless candles and secure anything that could trip guests.
- Accessibility check: keep decor off handrails, light every step, and skip fog machines if you expect asthma-sensitive visitors.
1) Floating witch hats
This is the porch DIY that makes people stop in their tracks. It reads magical, but it is basically fishing line and patience.
What you need
- Lightweight witch hats (dollar store or craft store)
- Clear fishing line or black thread
- Removable hooks or clear adhesive hooks
- Optional: battery fairy lights
How to do it
- Tie fishing line to each hat (around the inner band works well).
- Hang from your porch ceiling or soffit using removable hooks.
- Vary heights for a floating swarm effect.
- Tuck fairy lights above the hats for extra glow.
Time: 20 to 45 minutes. Cost: low. Weather: best for covered porches (wind can tangle lines).

2) Dollar-store spooky lanterns
Lantern clusters are my visual merchandiser secret weapon. Translation: you get instant height and instant mood with almost no effort.
What you need
- Plastic lanterns or thrifted lanterns
- Black spray paint (to unify mismatched lanterns) or frosted spray paint (to diffuse the glow)
- Battery candles
- Optional: creepy extras like plastic rats, mini skulls, or gauze
How to do it
- Spray lanterns black (outdoors) if they are mismatched, or use frosted spray paint if you want softer, hazier light.
- Place battery candles inside.
- Group 3 to 5 lanterns by your door or steps, mixing sizes.
Time: 15 to 30 minutes (plus dry time if painting). Cost: low to medium. Weather: great outdoors if your candles and lanterns are outdoor-rated.

3) Upcycled pallet tombstones
If you have scrap wood, this is the perfect big impact for cheap project. Bonus: you can stash them in the garage and reuse every year.
What you need
- Old pallet boards or thin plywood
- Jigsaw or handsaw
- Exterior paint (gray, off-white, black)
- Sandpaper
- Optional: stencils or paint pen
How to do it
- Cut tombstone shapes (arched tops look classic).
- Sand edges and rough up the face for age.
- Paint gray, then dry-brush off-white highlights and black shading.
- Stake into planters or the yard using scrap wood supports.
Time: 1 to 2 hours. Cost: low (especially with scrap). Weather: outdoor-friendly with exterior paint or a clear coat.

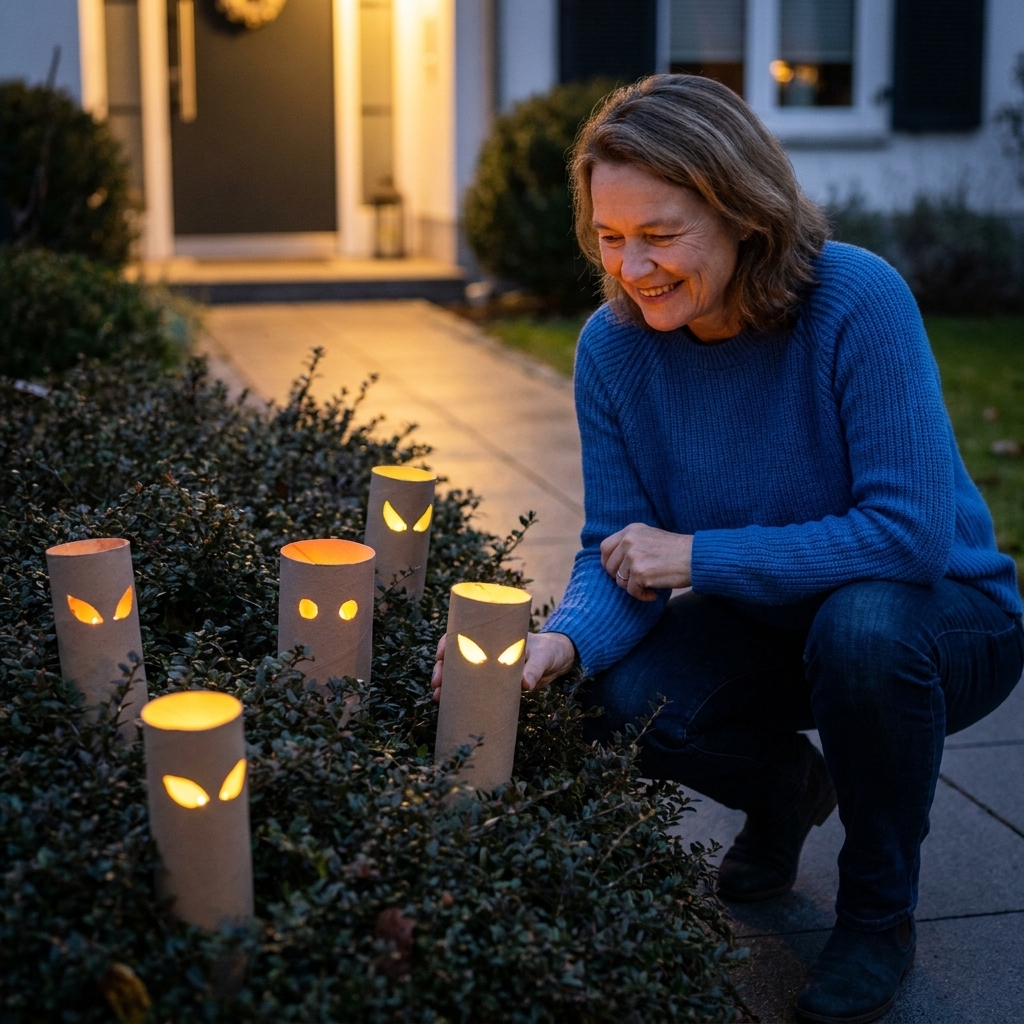
4) Glowing eyes in the bushes
This one is silly in the best way, and it takes maybe 15 minutes once you gather supplies.
What you need
- Cardboard toilet paper rolls
- Glow sticks or small battery tea lights
- Craft knife or scissors
- Tape
How to do it
- Cut eye shapes into the rolls (mix shapes and sizes). Leave the eyes on one side so you can aim them outward.
- Activate glow sticks and slide inside, then use a small piece of tape to keep them from slipping.
- If using battery tea lights, tape the tea light behind the cutouts so the eyes glow forward.
- Tuck into shrubs or planters near your porch, aiming the eye cutouts toward the walkway.
Time: 10 to 20 minutes. Cost: very low. Weather: fine outdoors for a night or two; bring in if rain is coming.
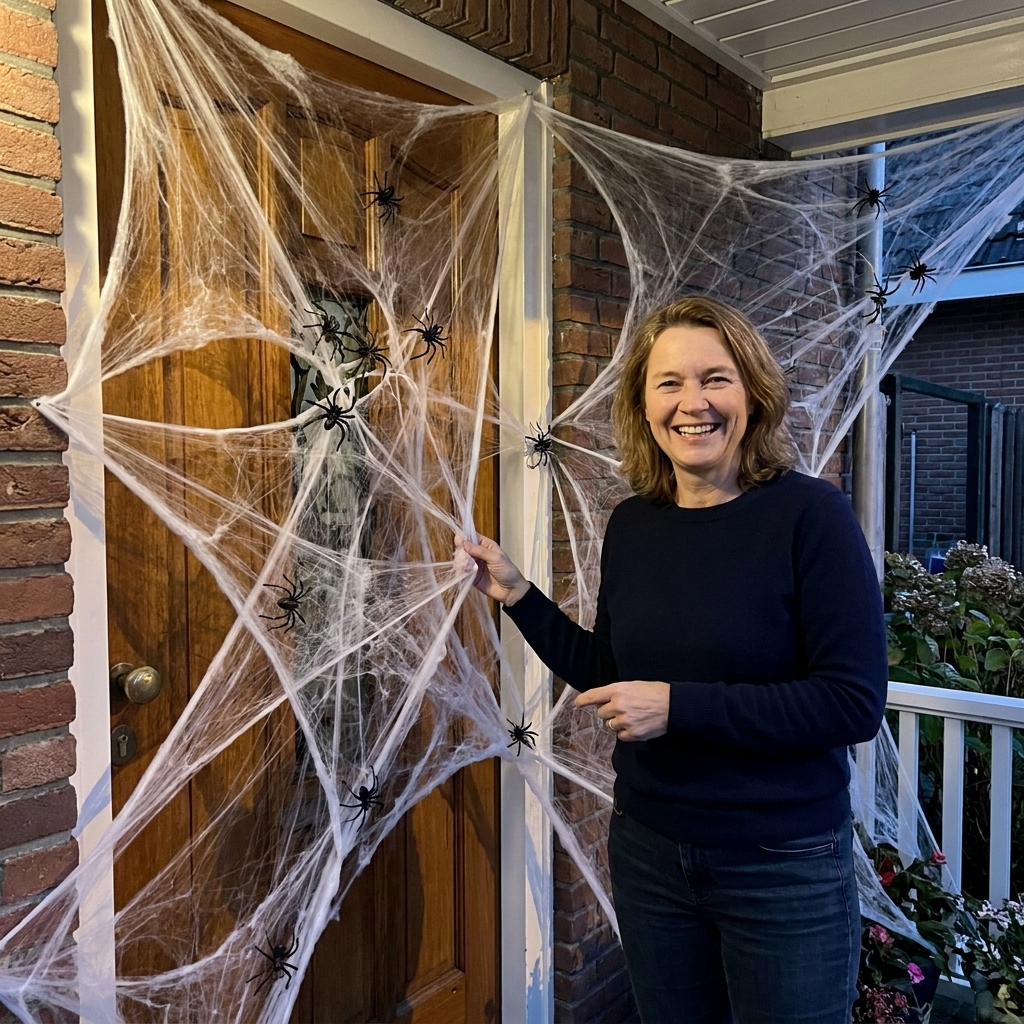
5) Giant spiderweb doorway
If you want dramatic with minimal crafting skills, this is your moment.
What you need
- Stretchy spiderweb material
- Painter’s tape or removable hooks
- Plastic spiders
How to do it
- Start at the top corners of your door frame and stretch webbing diagonally.
- Build layers until it looks dense, especially at the corners.
- Add spiders where strands intersect.
Time: 15 to 25 minutes. Cost: low. Weather: outdoor-friendly, but it can collect debris in wind and rain.
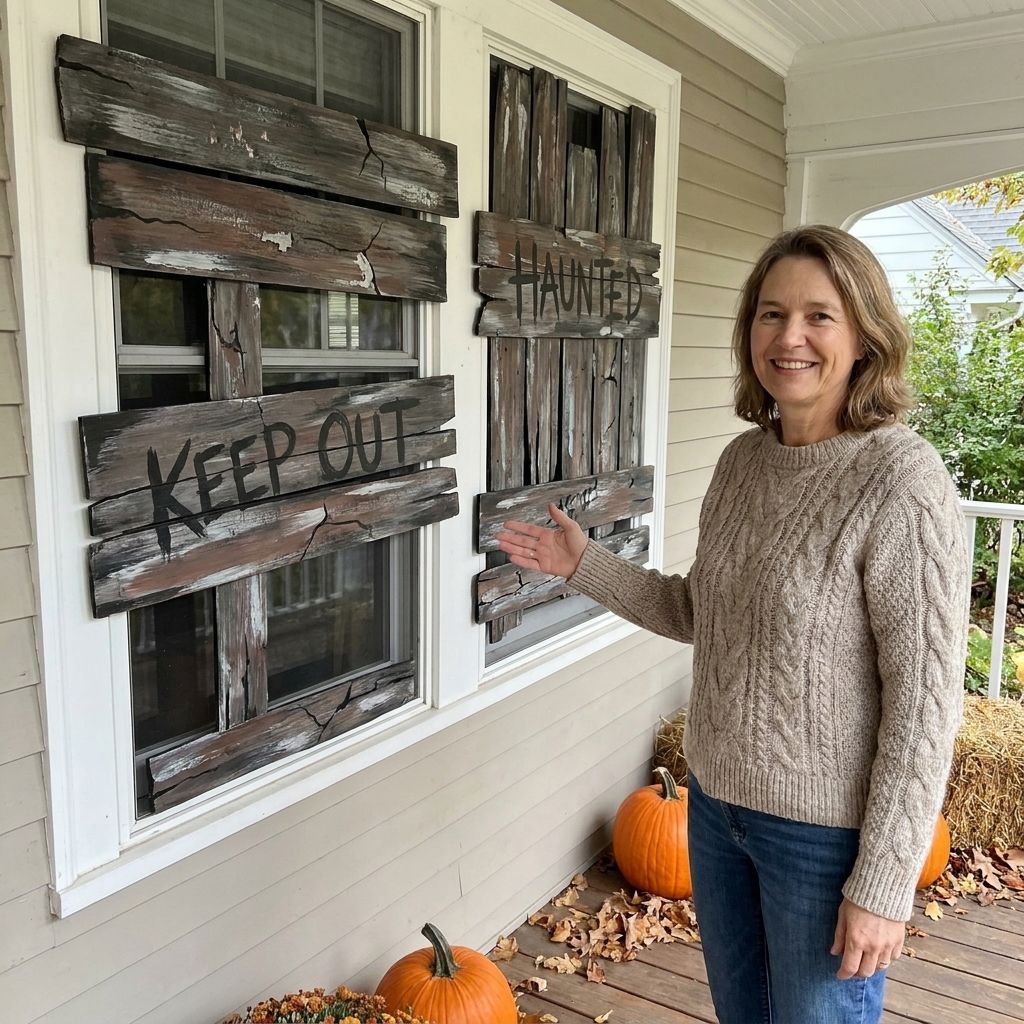
6) Faux boarded windows (foam core)
This gives haunted-house vibes without actually touching your real windows.
What you need
- Foam core boards or cardboard
- Black and brown paint
- Painter’s tape, removable mounting putty, or Command strips
- Optional: sandpaper for distressing
How to do it
- Cut strips that look like uneven boards.
- Paint and distress.
- Mount to the window trim (not the glass) with removable options. Test your tape or adhesive in an inconspicuous spot first, especially on older paint, so you do not peel finish when you remove it.
Time: 30 to 60 minutes. Cost: low. Weather: best on a covered porch or sheltered window (foam core hates soaking rain).
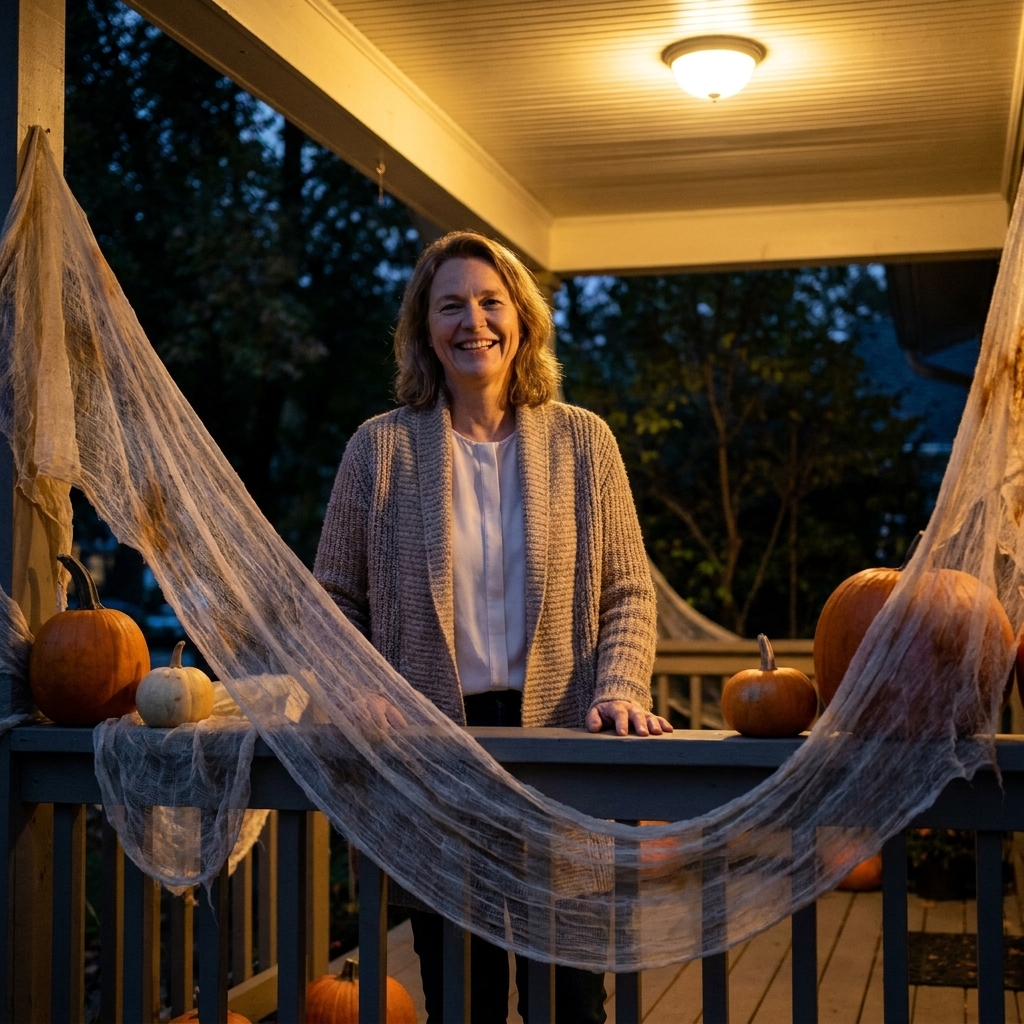
7) Cheesecloth porch ghost drips
Cheesecloth is my favorite cheap shortcut to instant spooky. It photographs beautifully at night, too.
What you need
- Cheesecloth
- Black tea bags or coffee (optional for aging)
- Command hooks or clothespins
How to do it
- Optional: stain cheesecloth in diluted tea for a dingy look, then dry.
- Drape from railings, around planters, or across the porch ceiling corners.
- Pull and stretch for wispy strands.
Time: 10 to 25 minutes (plus dry time if staining). Cost: low. Weather: covered porch is best (wet cheesecloth looks less cute and more sad).
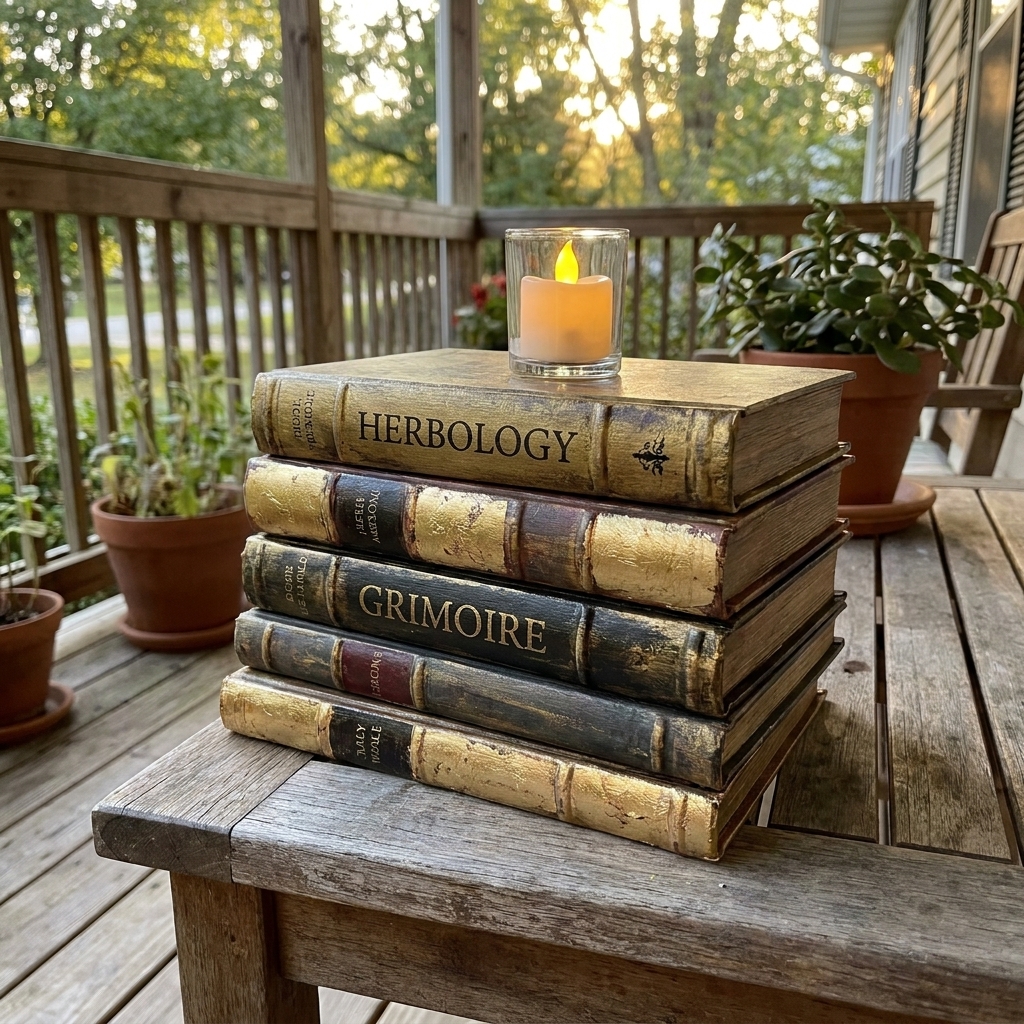
8) No-carve spellbook porch stack
This is perfect for covered porches because you can use thrifted hardcovers you do not mind transforming.
What you need
- 3 to 6 old hardcover books
- Acrylic paint (black, brown, metallic gold)
- Paintbrushes
- Optional: twine, faux moss, plastic bugs
How to do it
- Paint covers dark and add simple aged edges with dry brushing.
- Stack near the door with a candle on top.
- Add twine wrap or moss for a witchy finish.
Time: 30 to 60 minutes (plus dry time). Cost: low. Weather: covered porch only unless you seal them well.
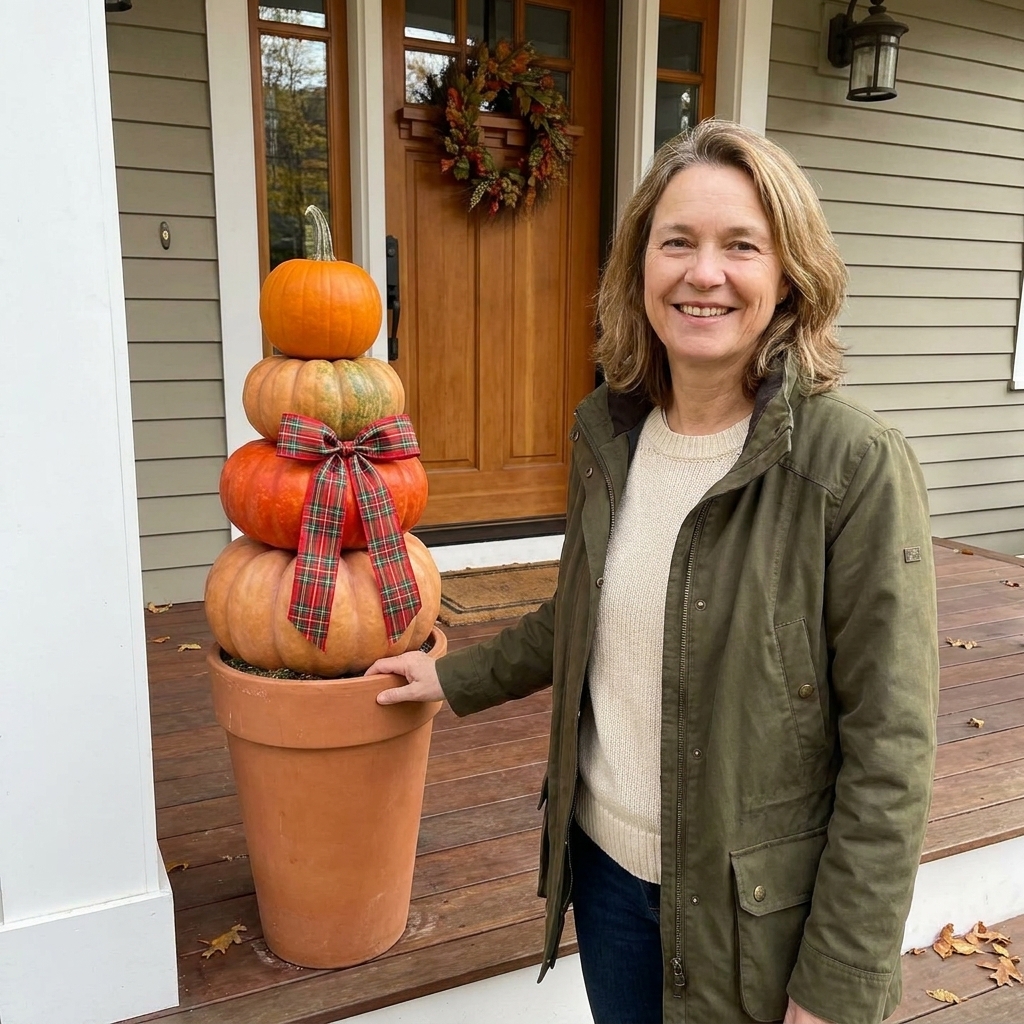
9) Pumpkin topiary (real or faux)
Topiaries look high-end, but this one is very forgiving. Slightly lopsided is charming, I promise.
What you need
- 3 faux pumpkins (or real, if using a short-term display)
- Wood dowel or sturdy stake
- Planter and floral foam (or a bucket filled with gravel)
- Hot glue (for faux pumpkins)
How to do it
- Secure dowel into foam or gravel inside a planter.
- Stack pumpkins onto the dowel from largest to smallest.
- Add a bow, faux leaves, or a little black crow on top.
Real pumpkin note: Real pumpkins are heavier and piercing them can speed up decay. If you go real, assemble close to Halloween and expect to rebuild sooner if it is warm outside.
Time: 20 to 40 minutes. Cost: medium (cheaper if you already have a planter). Weather: faux holds up best outdoors; real can soften in rain.
10) Hanging bats (paper or felt)
Hanging bats are quick, lightweight, and they move just enough in the breeze to feel alive.
What you need
- Black cardstock or felt
- Bat template
- Scissors
- Fishing line
- Removable hooks
How to do it
- Cut multiple bats in different sizes.
- Fold wings slightly upward for dimension.
- Hang at staggered heights near your doorway or porch ceiling.
Time: 20 to 45 minutes. Cost: low. Weather: felt does better than cardstock outdoors; covered porch is safest.

11) Pool noodle pumpkin arch
This is the DIY that looks wildly impressive for the cost. It is also lightweight and renter-friendly if you use removable hooks.
What you need
- Orange pool noodles
- Green craft wire or green duct tape
- Black duct tape or paint pen
- Zip ties
- Removable hooks
How to do it
- Bend noodles into arch curves and connect with zip ties.
- Wrap sections with green wire for vines.
- Add jack-o’-lantern faces with black tape.
- Mount around the door using multiple hooks (more than you think). If you have a railing nearby, add a discreet zip tie anchor point so it does not sag or twist in wind.
Time: 30 to 60 minutes. Cost: low. Weather: surprisingly sturdy, but wind can shift it, so anchor well.

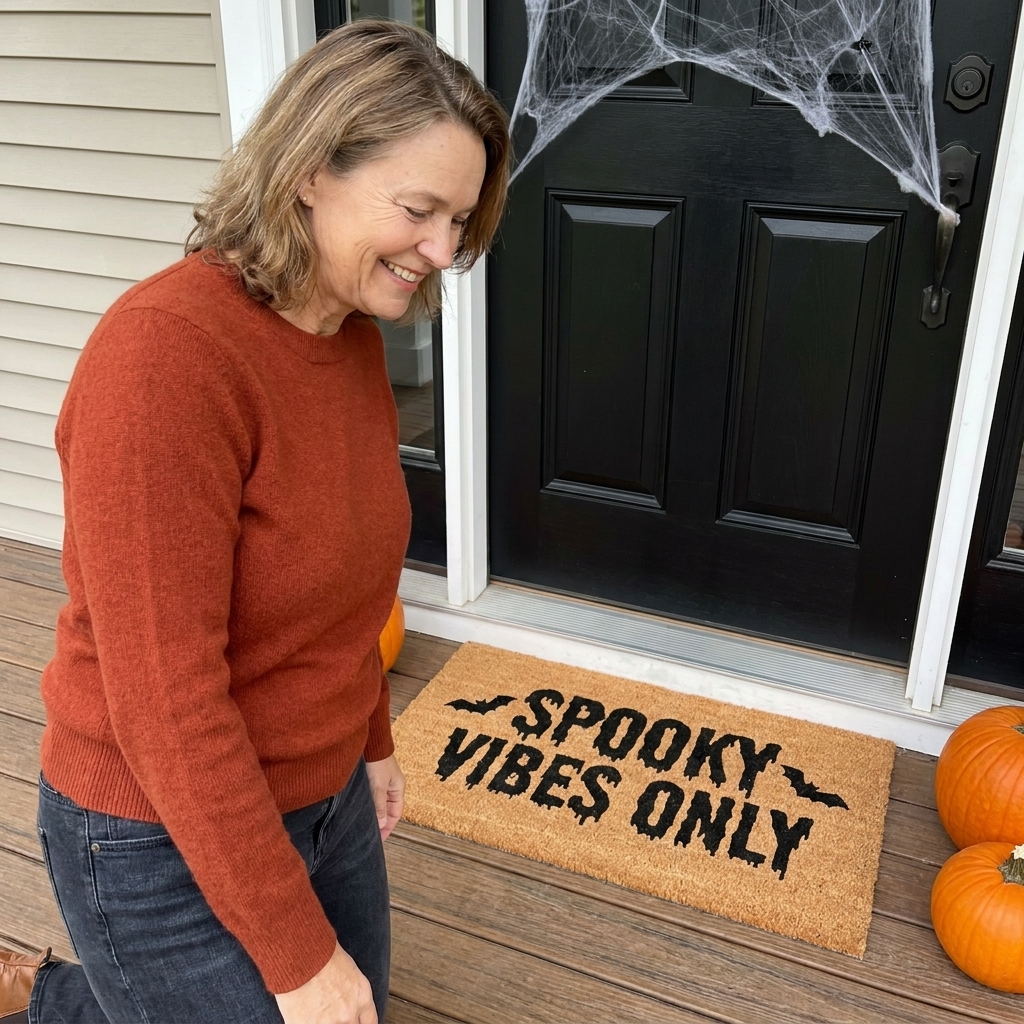
12) Witch parking doormat stencil
If you want a subtle wink that still feels festive, this is a quick porch refresh.
What you need
- Plain coir doormat
- Stencil (store-bought or DIY taped letters)
- Outdoor black paint
- Stencil brush or sponge
How to do it
- Tape stencil firmly so it does not shift.
- Dab paint straight down (do not swipe).
- Let dry fully before placing outside.
Time: 15 to 25 minutes (plus dry time). Cost: low. Weather: outdoor-friendly; it will wear naturally over the season.
13) Trash bag dead leaves garland
This one sounds odd until you see it. The crinkly shine reads wonderfully creepy, especially at night.
What you need
- Black trash bags
- Scissors
- Twine or fishing line
- Stapler or tape
How to do it
- Cut trash bags into large leaf-ish shapes.
- Crumple each piece slightly for texture.
- Staple or tape onto twine and drape across railings.
Time: 20 to 40 minutes. Cost: very low. Weather: outdoor-friendly, but bring it in on very windy nights unless you want it migrating.

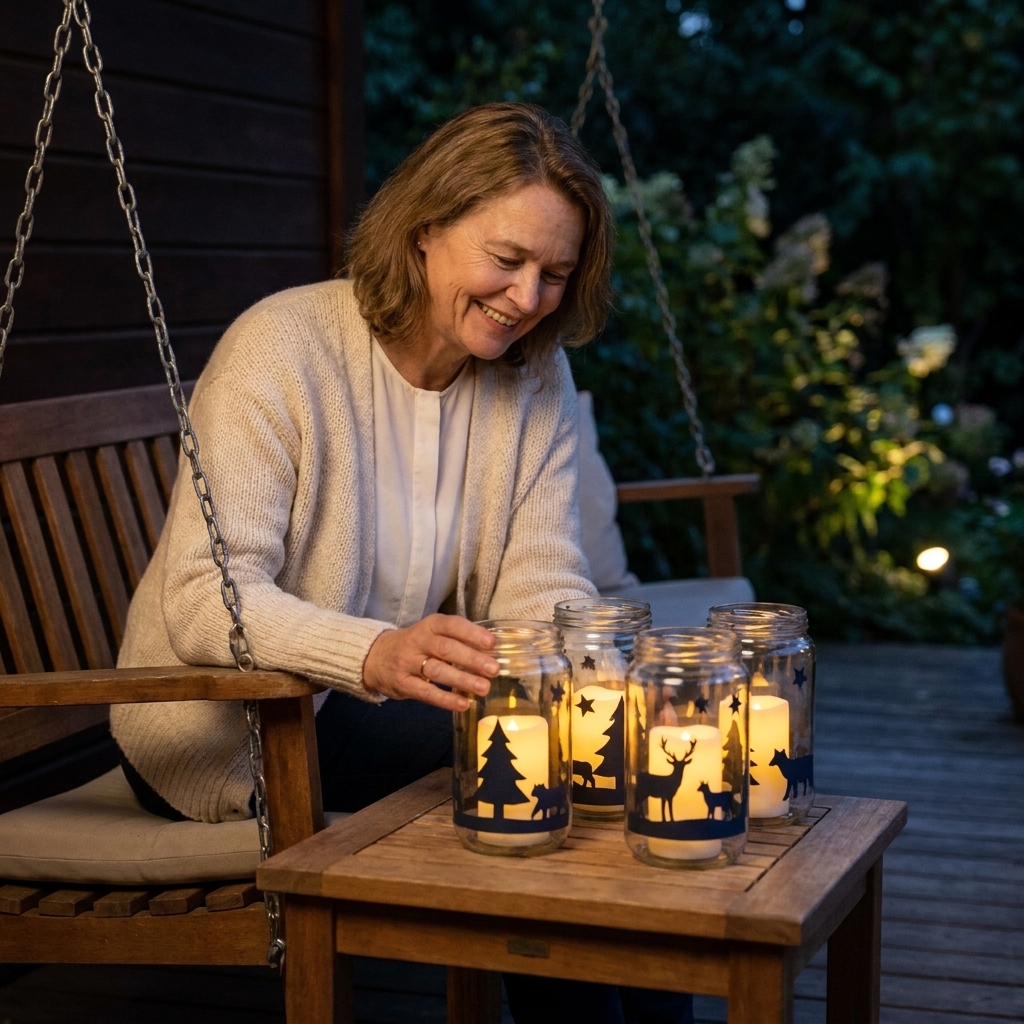
14) Specimen jars with silhouettes
These look amazing on a small porch table beside a doorbell bowl of candy.
What you need
- Clear jars (pasta sauce jars work)
- Printed or hand-cut black silhouettes (spiders, snakes, with labels removed)
- Mod Podge or tape
- Water + a drop of food coloring (optional)
- Battery tea light, or a waterproof LED coaster/base for underlighting
How to do it
- Attach silhouettes to the outside of jars.
- Fill with water (optional tint for mood).
- For glow, set a battery tea light behind the jar, or use a waterproof LED base under the jar. Keep electronics dry and never submerge the light.
Time: 15 to 30 minutes. Cost: low. Weather: best on a covered porch (wind can tip jars).
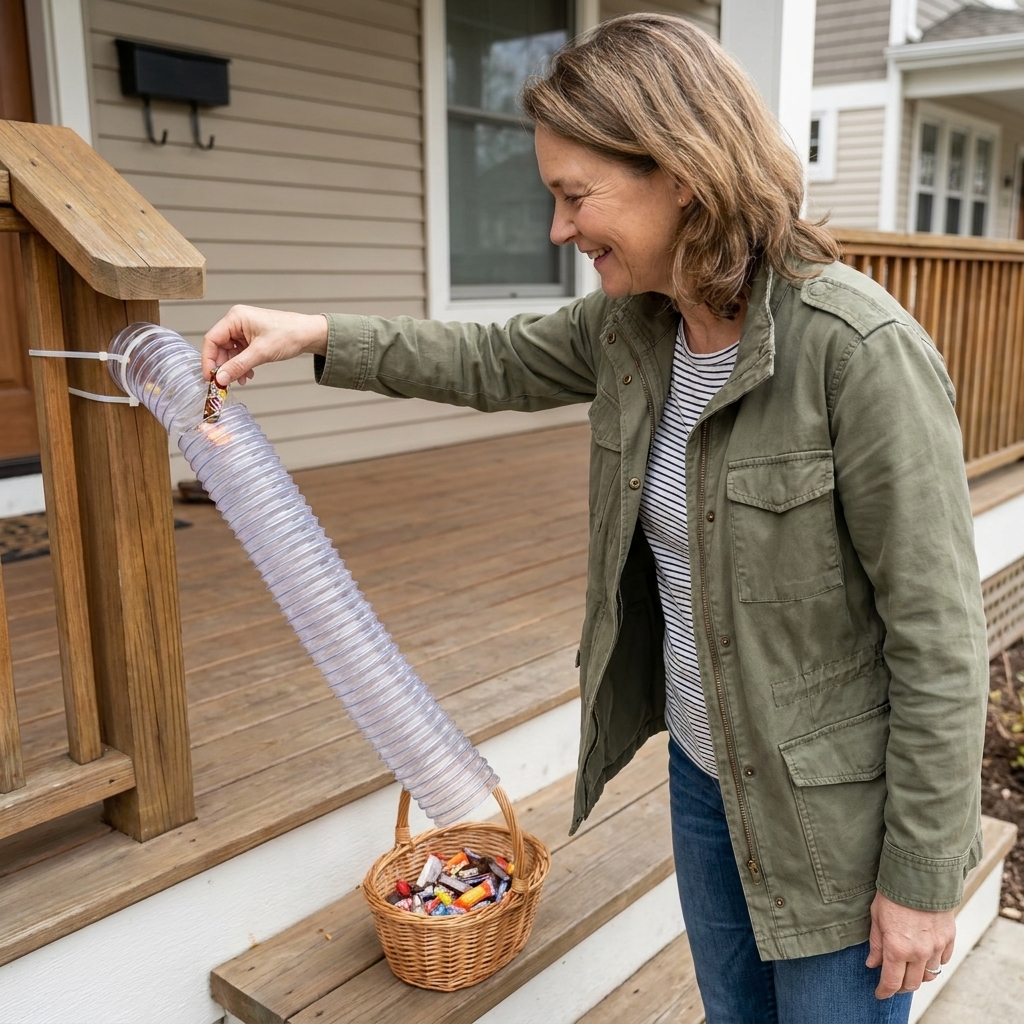
15) DIY candy chute
If you have steps or want a playful way to deliver candy, a simple chute becomes an instant porch attraction.
What you need
- A clean, food-safe surface for the chute, like a new plastic rain gutter/downspout piece (easy to wipe down)
- If using a flexible hose, make it brand new and dedicated to this project (no actual dryer vent use)
- Zip ties
- Railing hooks or sturdy tape
- Optional: black paper to wrap and monster-ify the opening
How to do it
- Secure the chute to your railing so it slopes gently down.
- Test with a few wrapped candies so nothing gets stuck.
- Decorate the top opening like a monster mouth using paper teeth.
Safety and sanity note: Keep candy fully wrapped and wipe down the chute if it sits outside.
Time: 20 to 45 minutes. Cost: low to medium. Weather: outdoor-friendly if anchored well.
Styling tricks that look expensive
- Repeat shapes: if you do hats, repeat circles with pumpkins and lanterns.
- Hide the hardware: tuck hooks behind trim, wrap fishing line around beams, and use black zip ties outdoors.
- Use odd numbers: 3 lanterns, 5 pumpkins, 7 bats. It looks more natural.
- Add one natural element: branches, cornstalks, or dried hydrangeas instantly elevate the whole porch.
Quick safety notes
- Choose flameless candles for porches, especially near fabric, leaves, or webbing.
- Secure hanging decor with weather-resistant hooks and check after windy days.
- Keep steps and walkways clear, and avoid loose cords where kids will run.
- Make sure you still have enough light on steps and landings for safe footing.
FAQ
What is the easiest DIY Halloween porch decoration for beginners?
Hanging bats, cheesecloth draping, and lantern clusters are the easiest. They are forgiving, fast, and look intentional even if you do them in one evening.
How do I make my porch decor more weatherproof?
Use faux pumpkins, plastic lanterns, and outdoor-rated hooks. For anything paper-based, keep it under a covered porch ceiling or swap to felt and seal painted wood with an exterior clear coat.
How do I decorate a small porch without clutter?
Go vertical: hanging hats or bats up top, one lantern cluster on one side, and a narrow topiary or tall planter on the other. Leave the center path open so it still feels welcoming.